.png)
This guide explains how to create a Custom Form. See Related Topics for how to manage accommodation forms and vaccine consents and surveys.
Custom Forms have many capabilities in TMV.
A Custom Form can include both patient and clinician questions to allow a multi-step onboarding workflow to be completed in one form. Additionally, a Custom Form can contain conditions, which can automatically change a participant’s User Group or Patient Tag assignment based on how they answer a Yes/No question.
Create a custom form
-
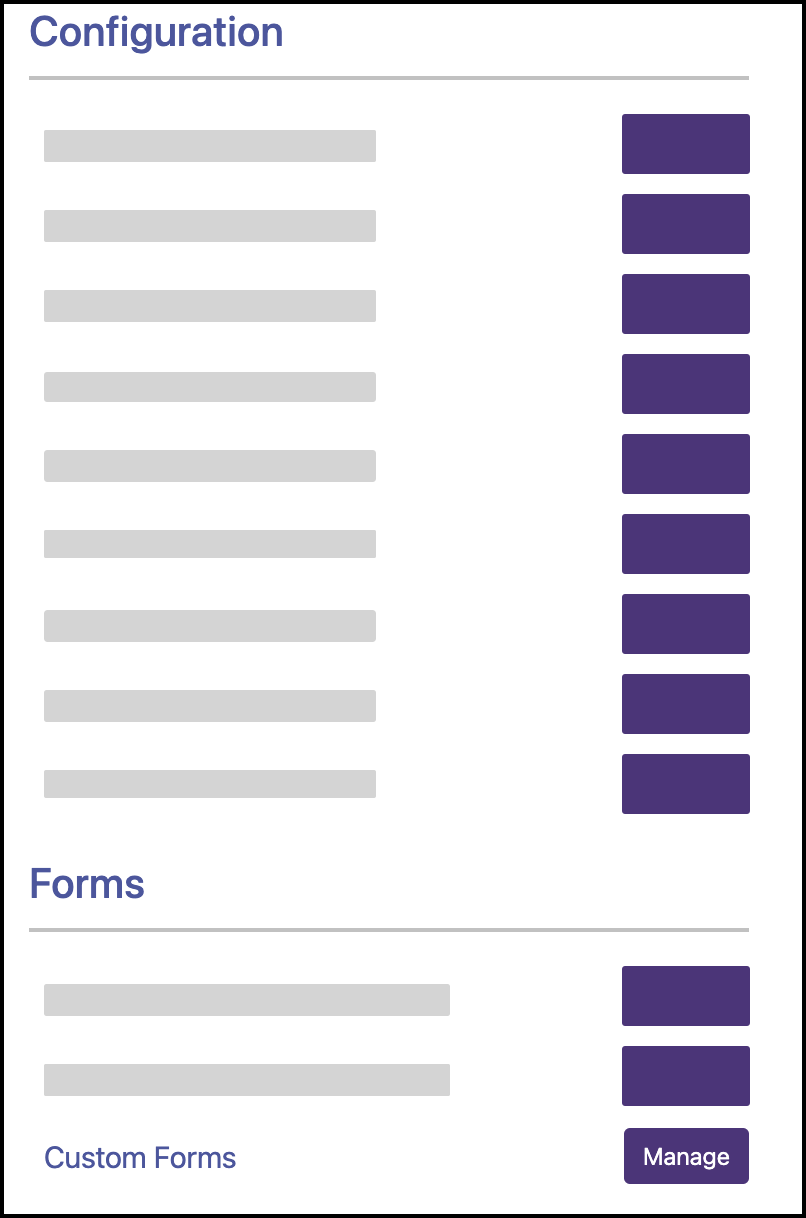
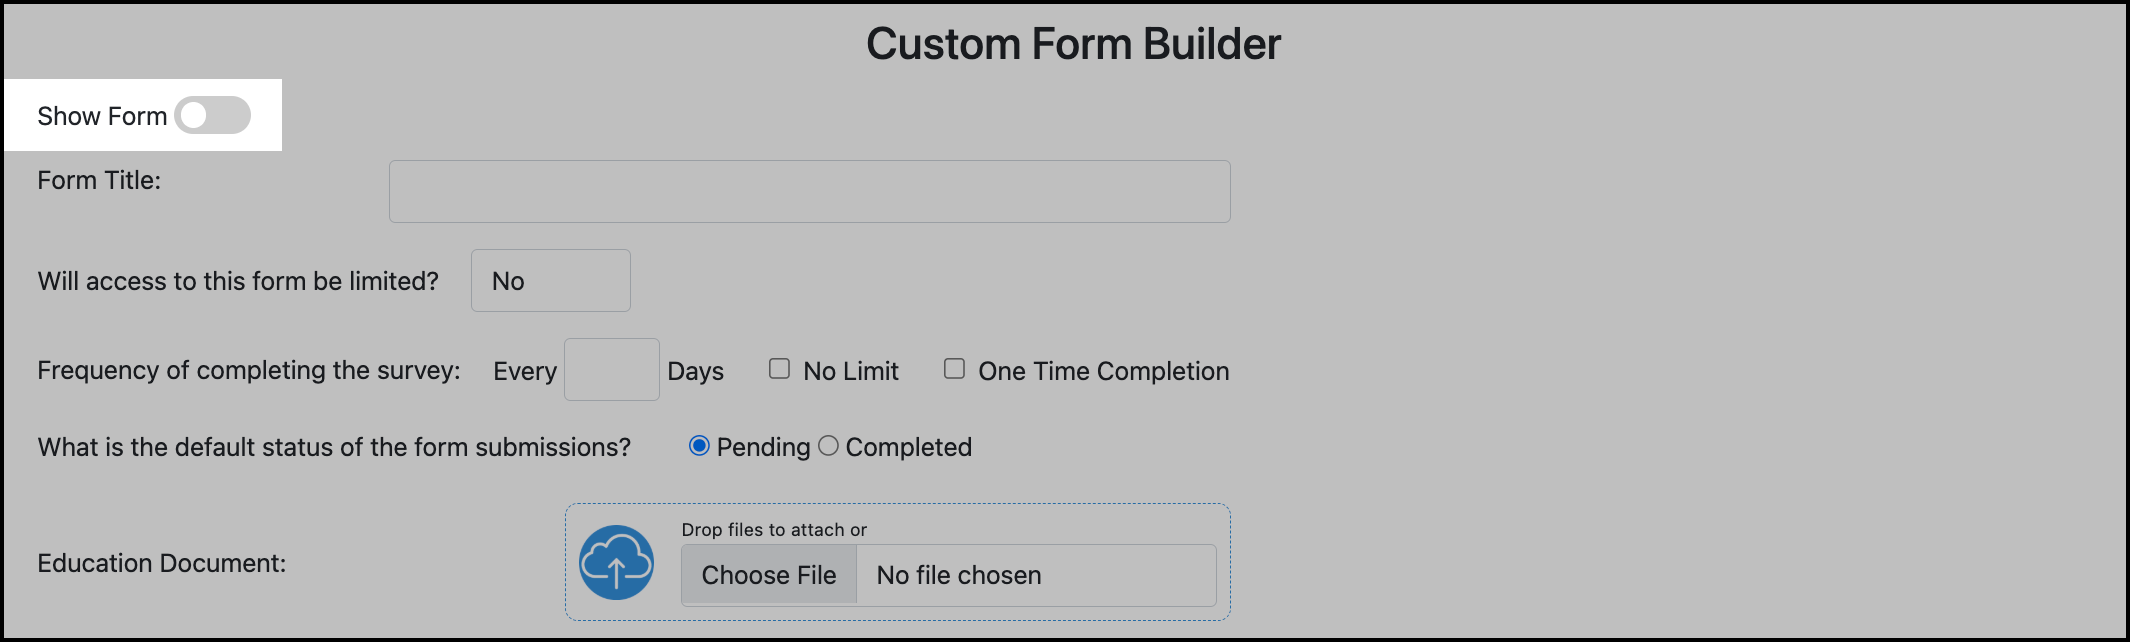
In you TMV clinical/admin portal, go to Administration.
-
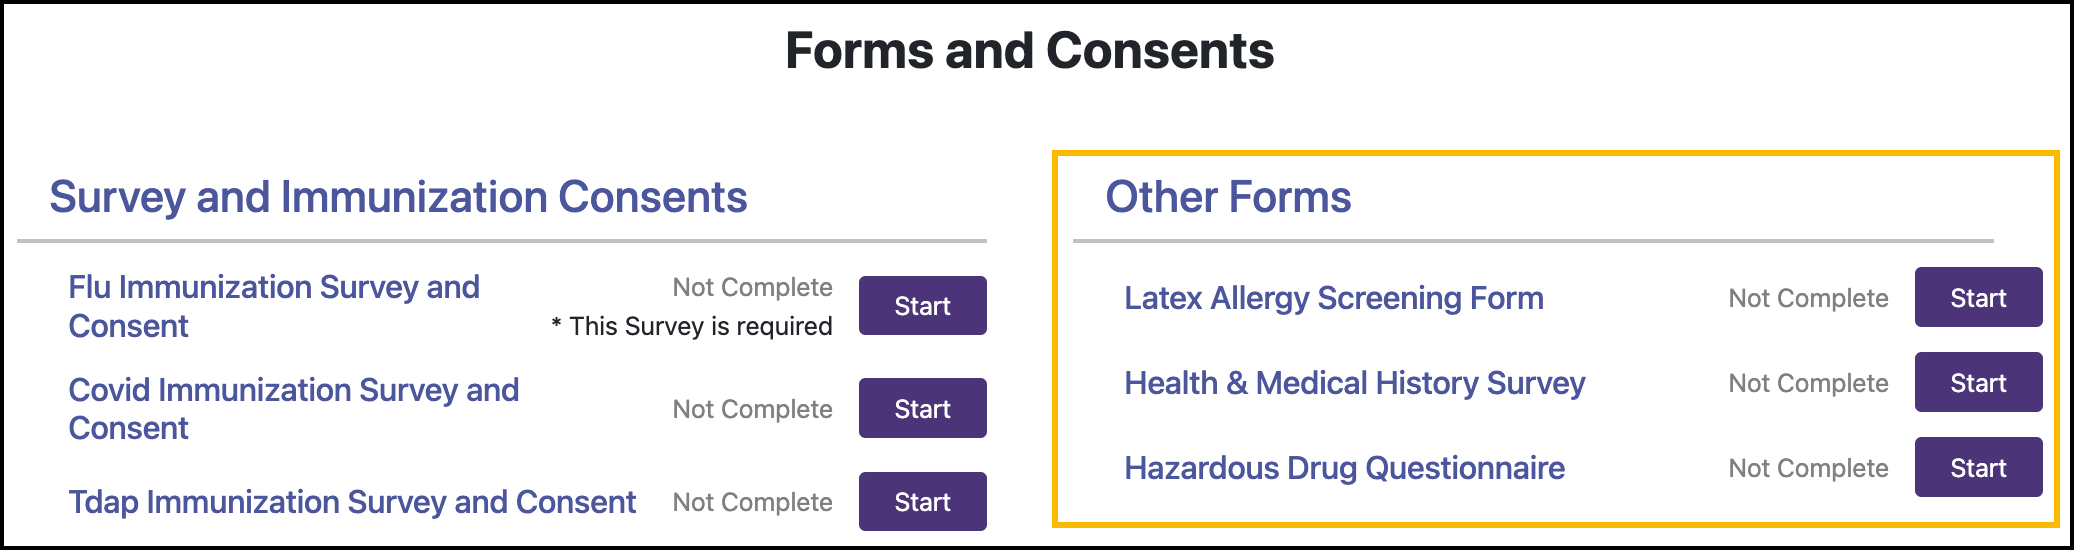
Go to Forms and click Manage for Custom Forms:
-
Click Create New.
-
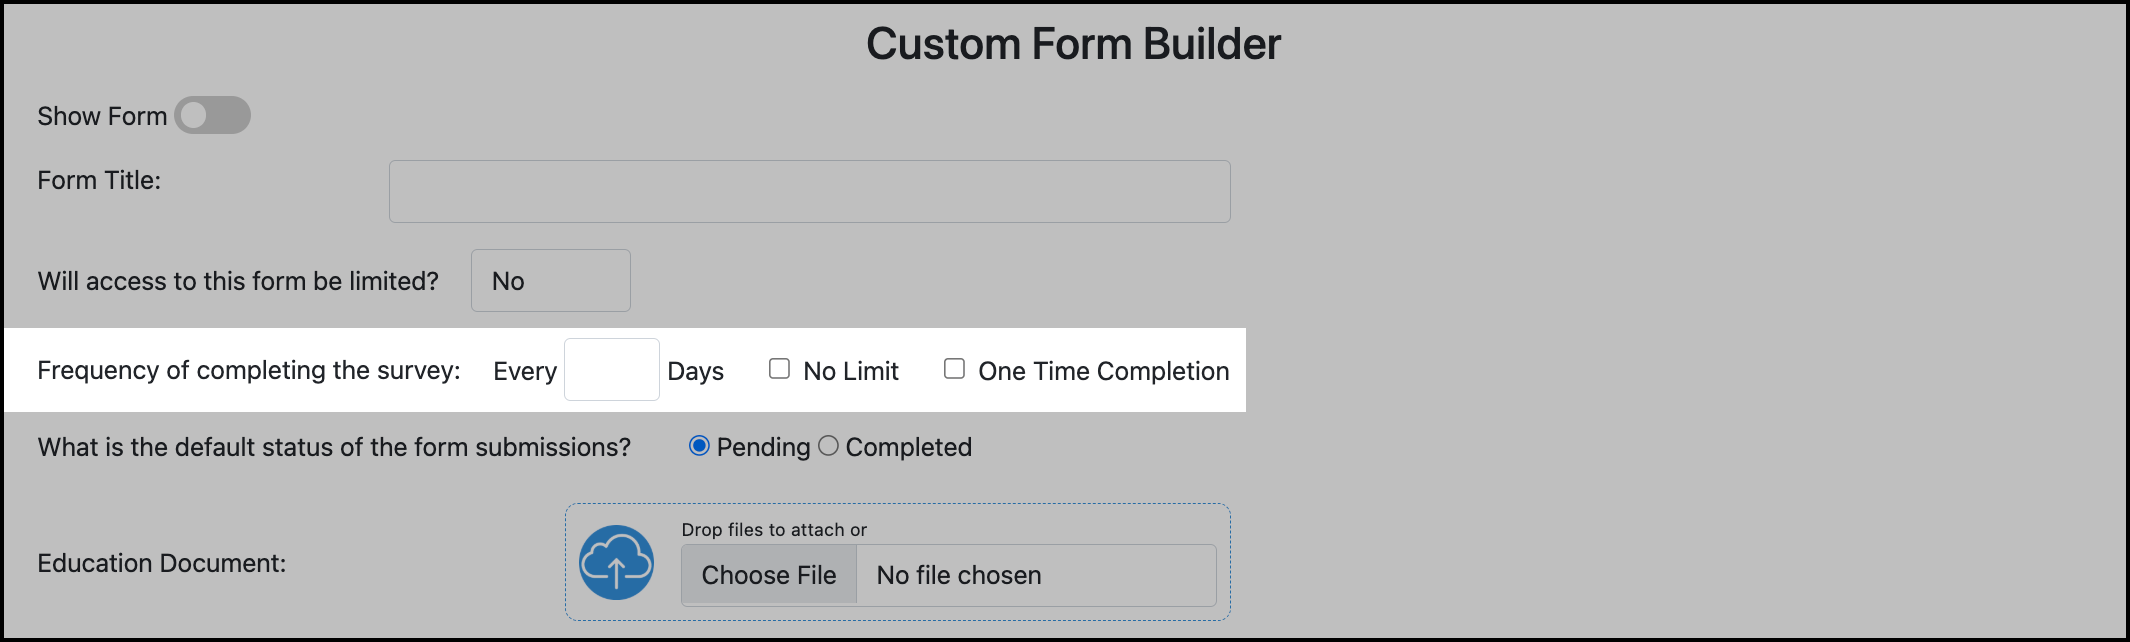
Enter the form title.
-
Select frequency that users can complete the form:
-
Select the default status of the form submissions.
Note: Pending is automatically selected. Form submissions with the Pending status must be manually reviewed and given the Completed status. If you do not want to review all form submissions, select Completed for the default status.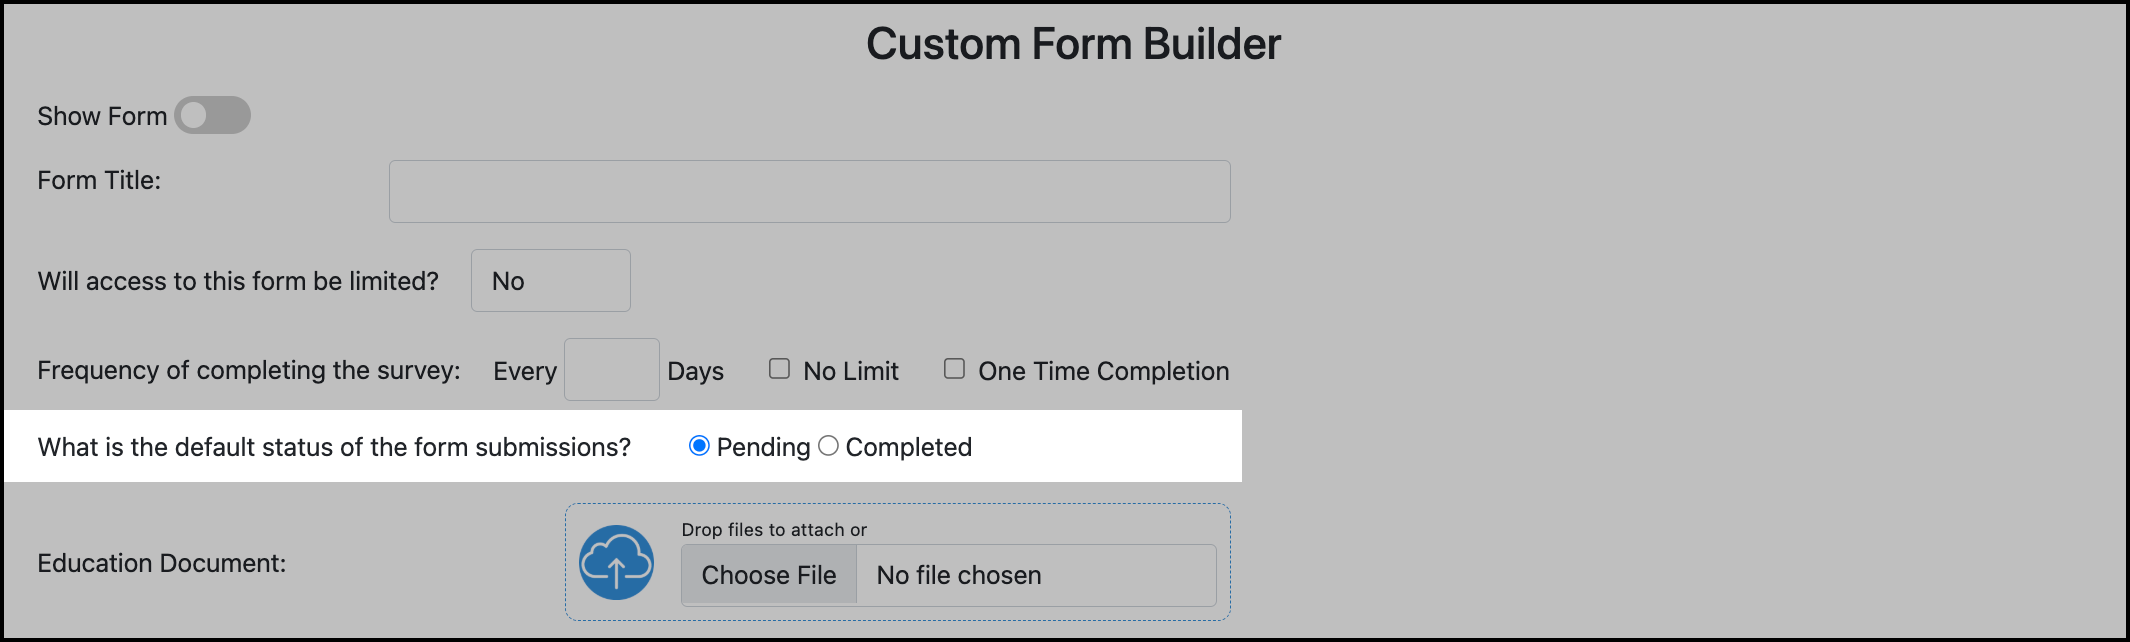
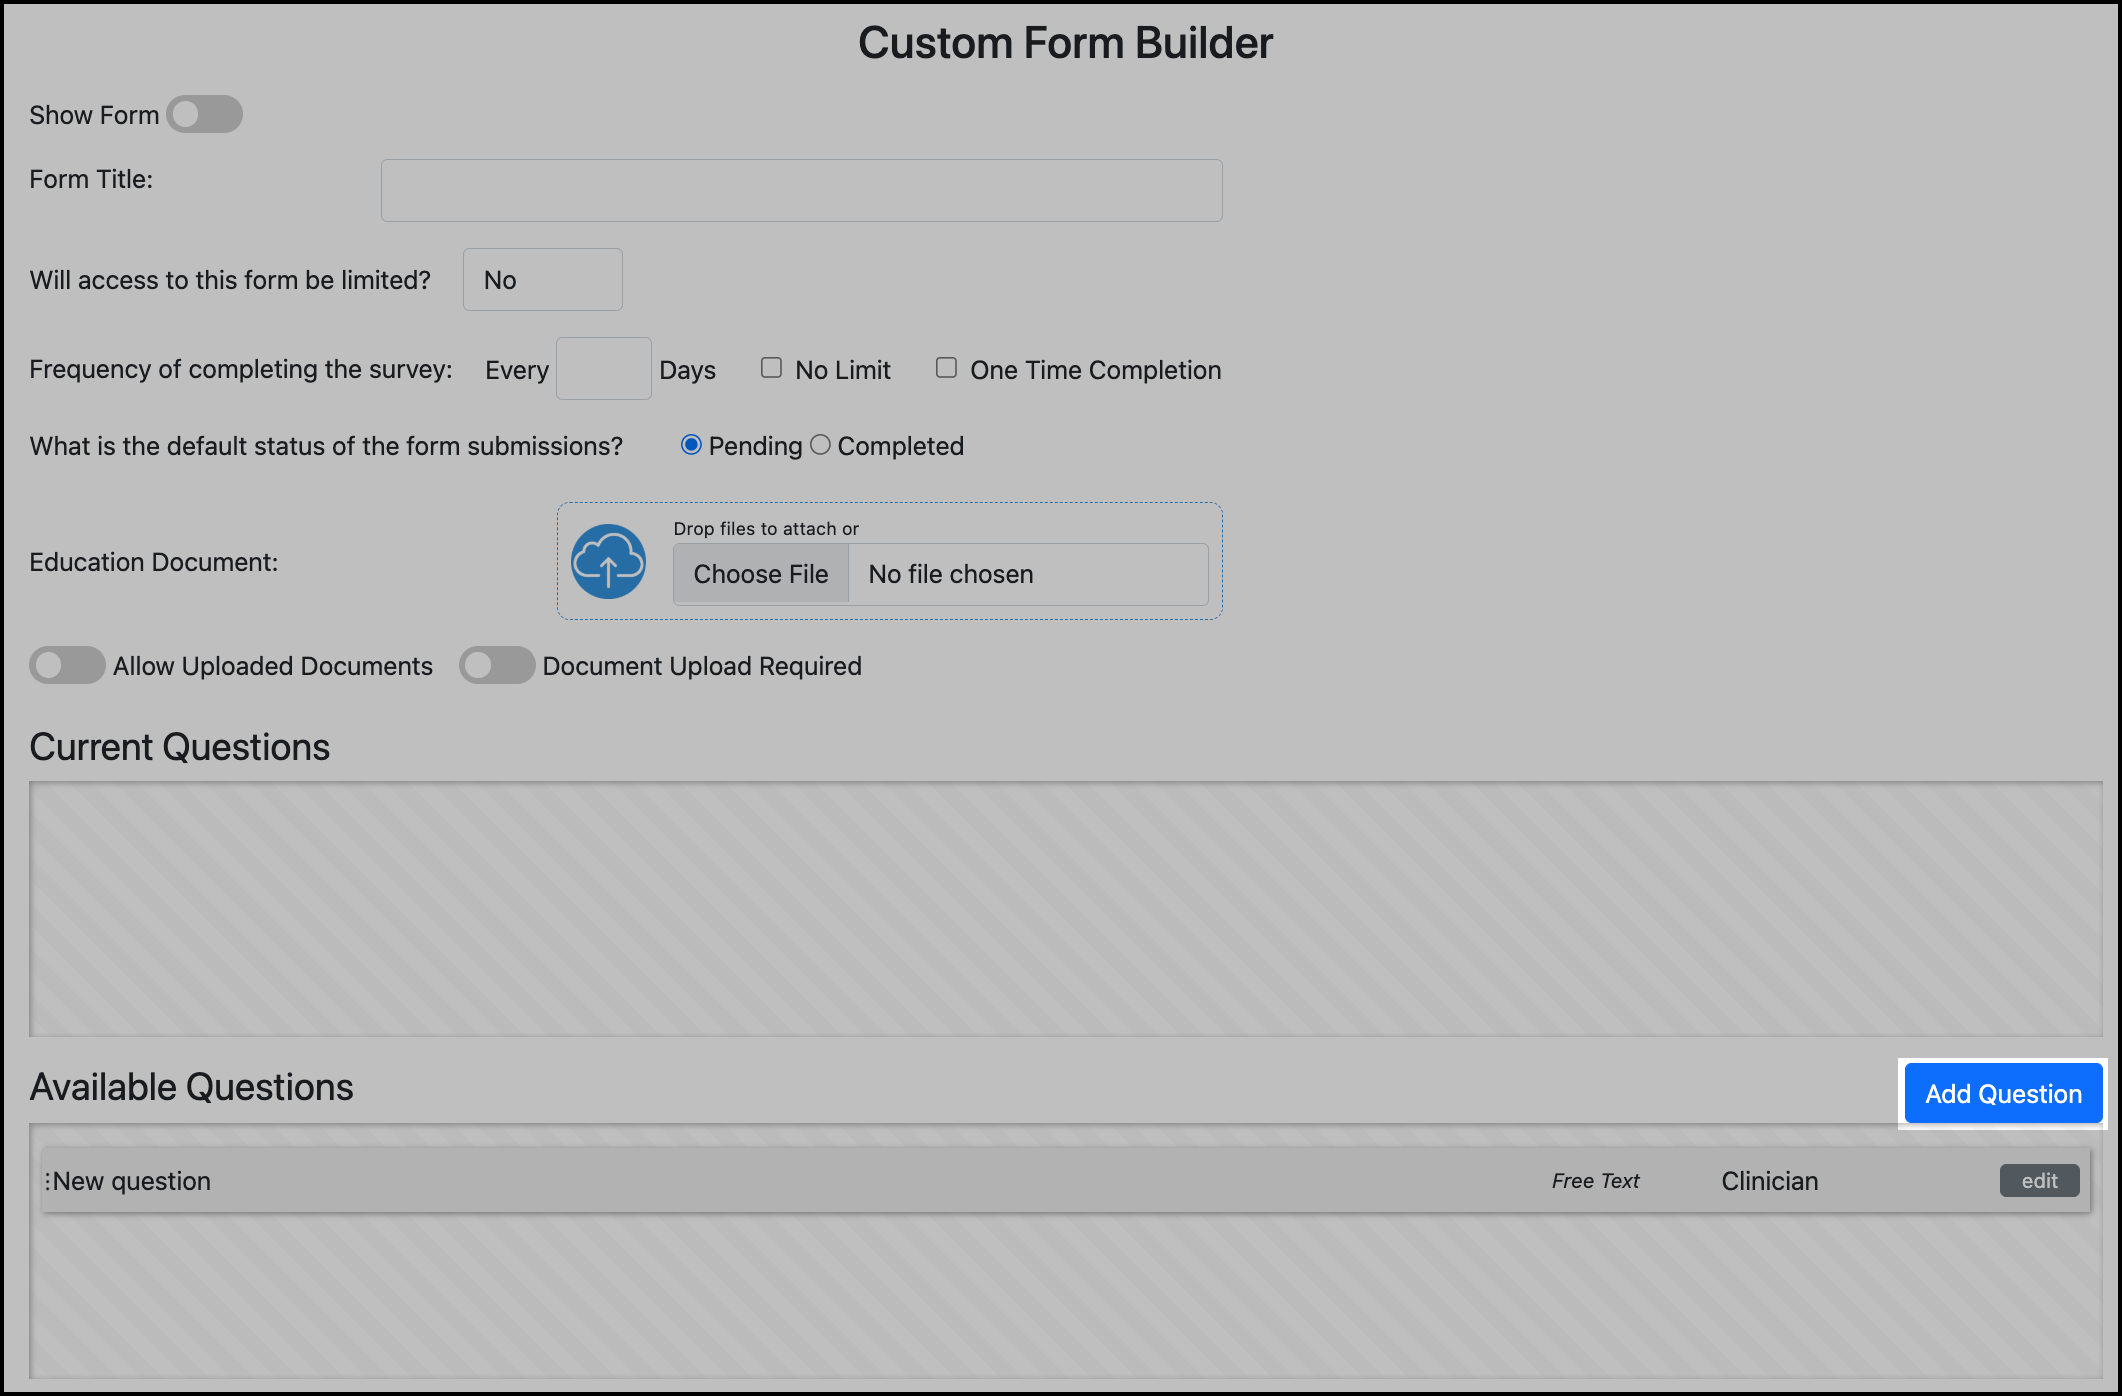
Create Questions
-
Click Add Question:
-
Enter the question.
-
Select response type.
-
If the question is required, turn on the Required toggle.
In this image, the Required toggle is on and the question is required.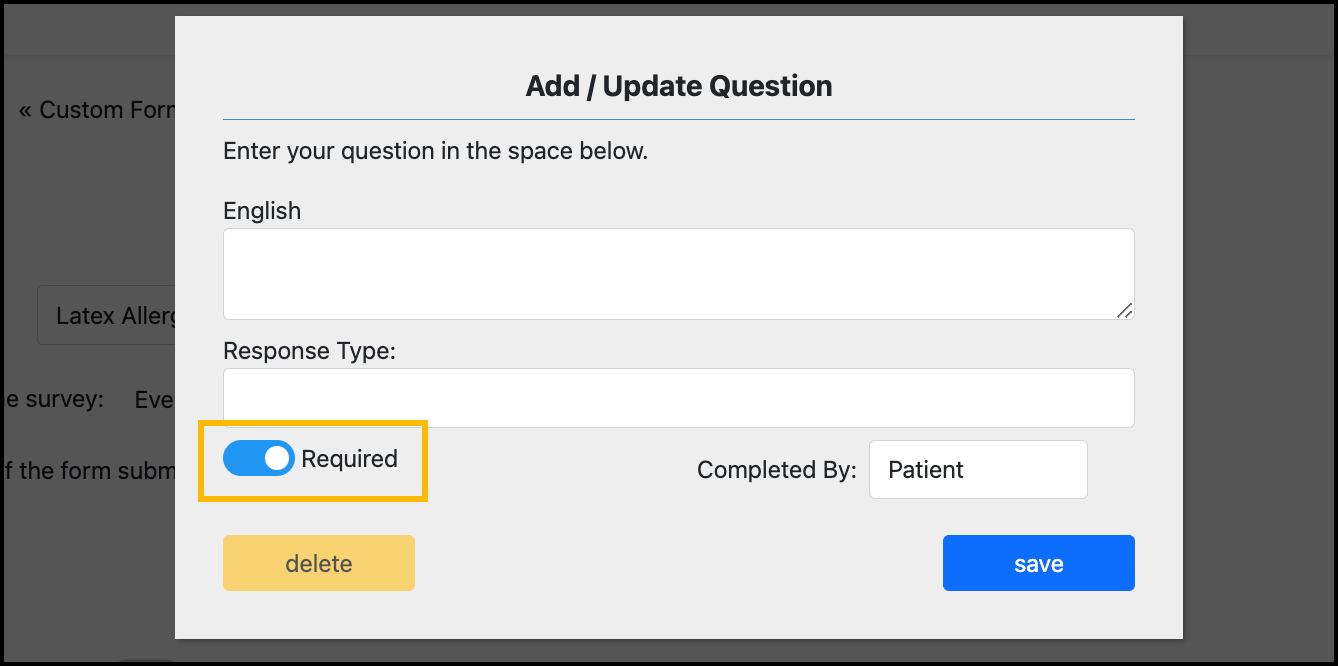
-
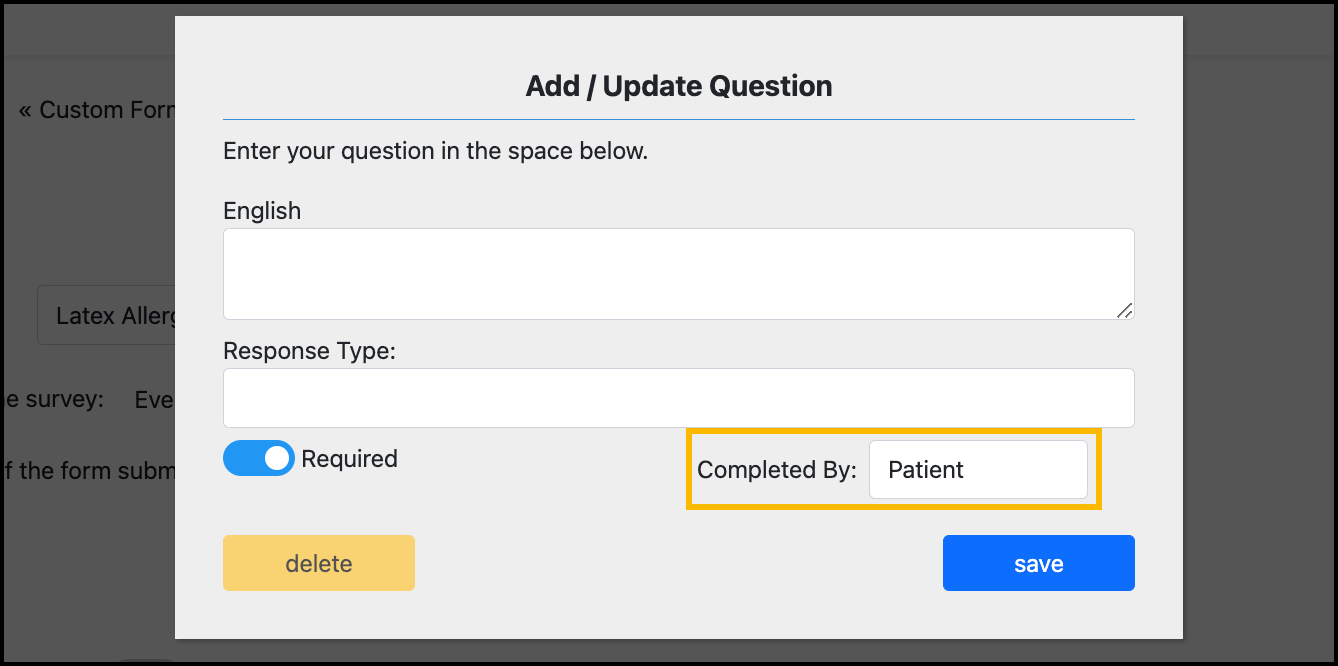
Select the Completed By user. This defines whether the question will be answered by a Patient user or a Clinical user. Patients cannot see questions set to be completed by Clinical users.
If your form contains Clinician questions, at least one Clinician question must be required. Otherwise, the form will not save to the In Progress status when a patient user completes their questions.
-
Save the question.
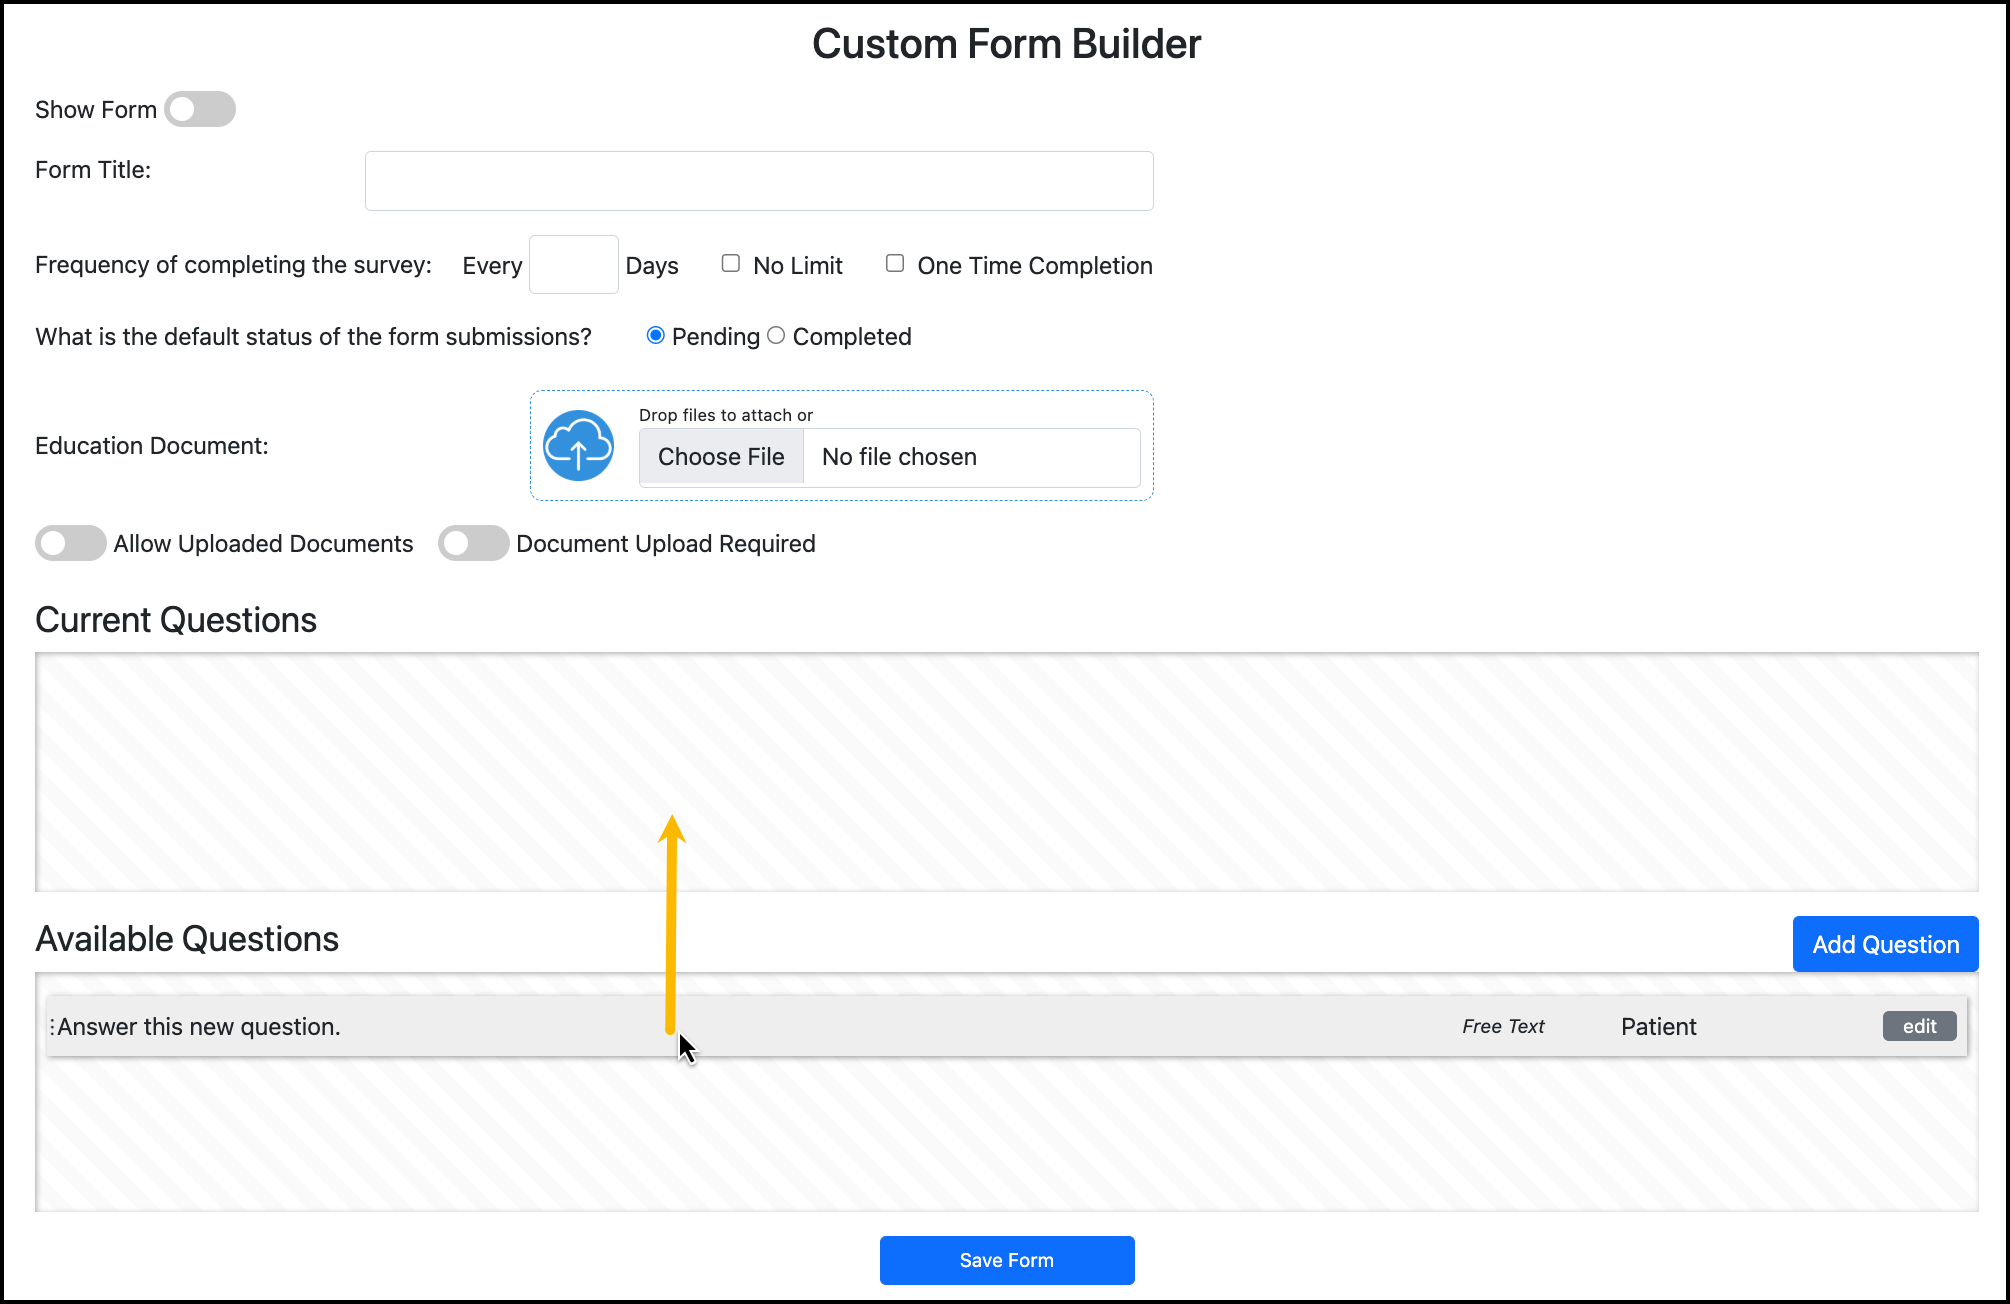
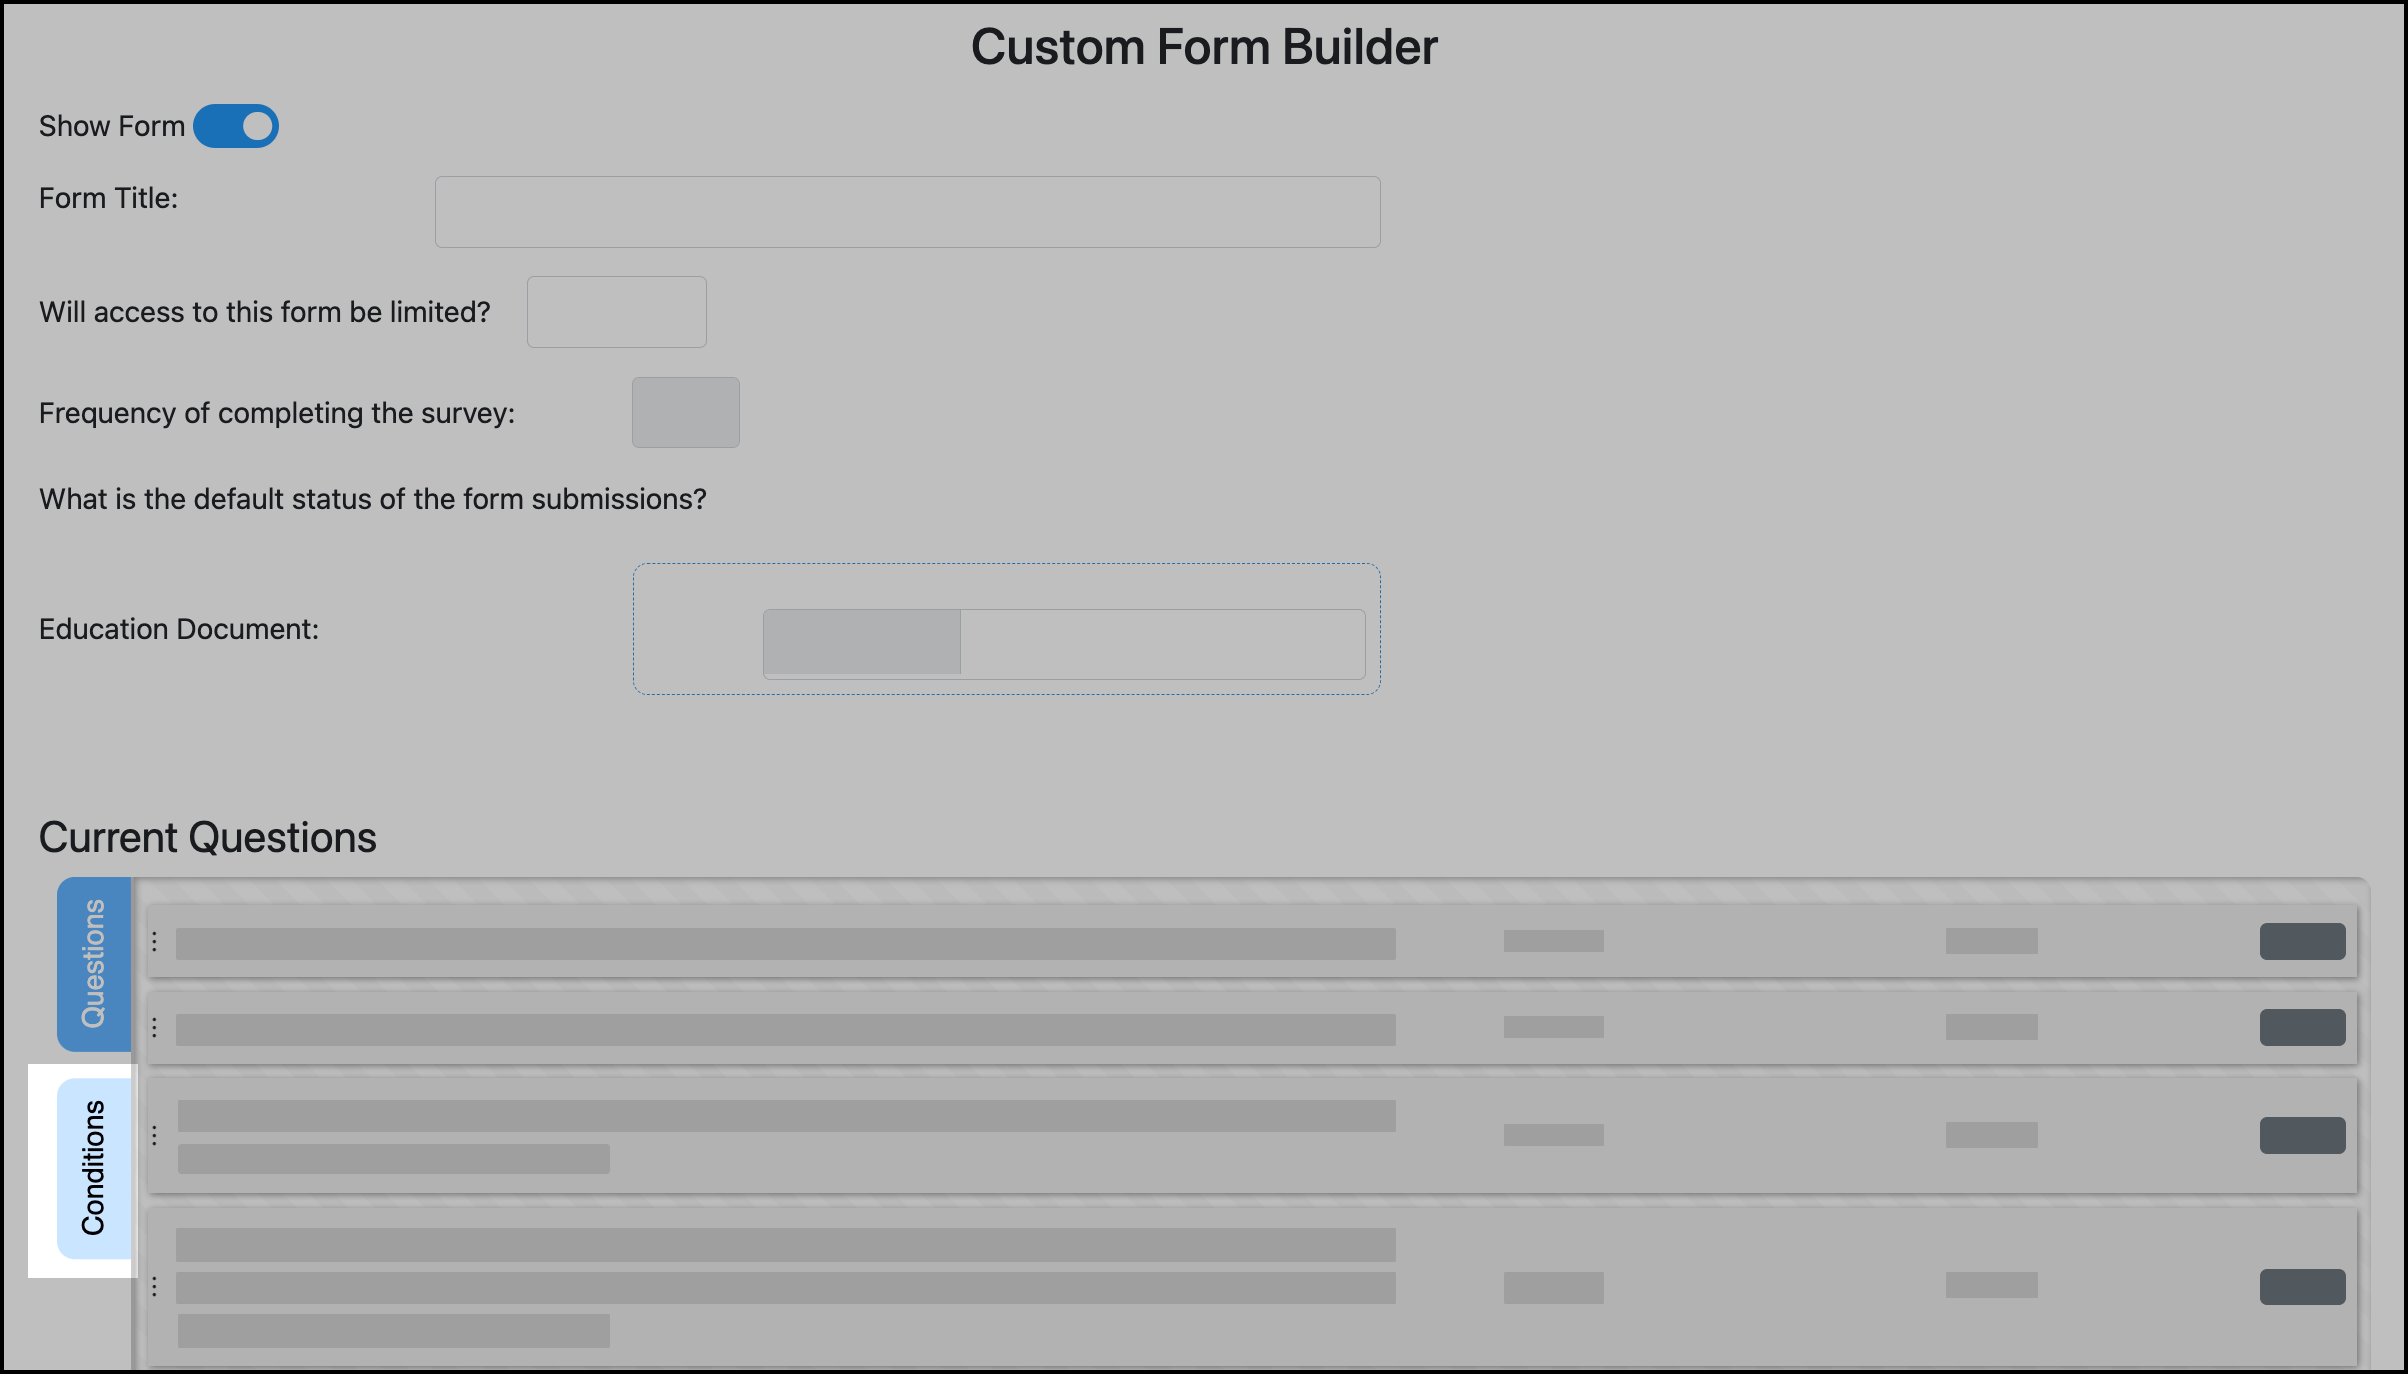
New questions will display in Available Questions. Drag and drop questions into Current Questions to display them on the form.
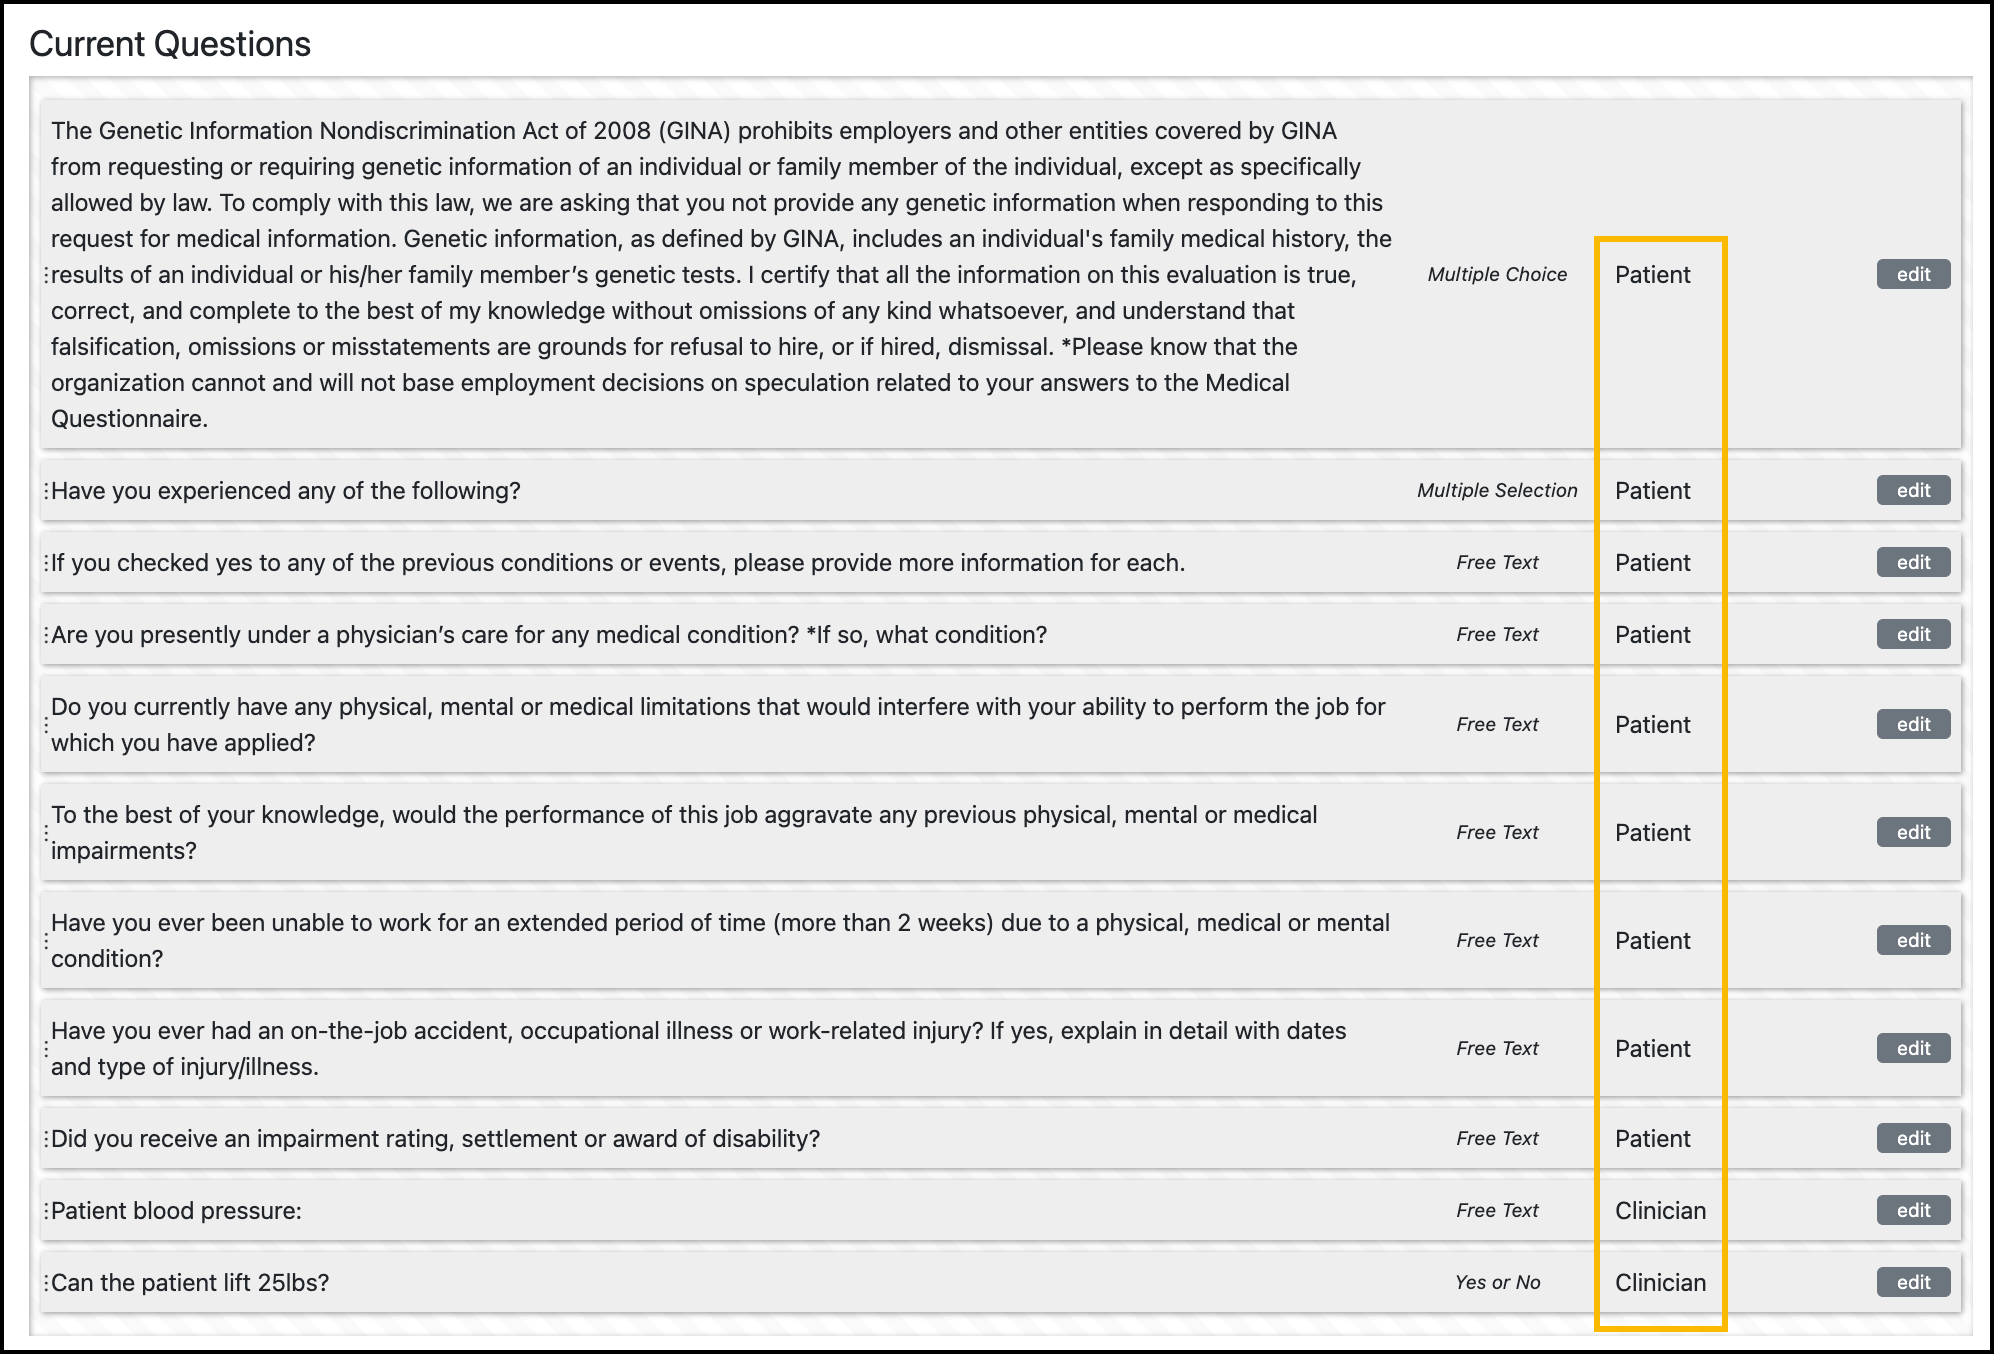
The highlighted column in the Current Questions summary shows the user role type that the question is intended for. Patients cannot see questions set to be completed by Clinical users.
Turn on the Show Form toggle to publish the form for users. Turn off the toggle to save as a draft.
Click Save Form to save all changes.
Create Conditions
Conditions allow a User Group or Patient Tag assignment to be automatically changed for a participant, based on how they answer a Yes/No question.
Yes/No questions must already be added to the form to build a condition.
Conditions automatically execute when a participant submits a form with an answer that triggers an action. This may immediately change the compliance requirements shown for the participant in TMV.
To create a condition:
-
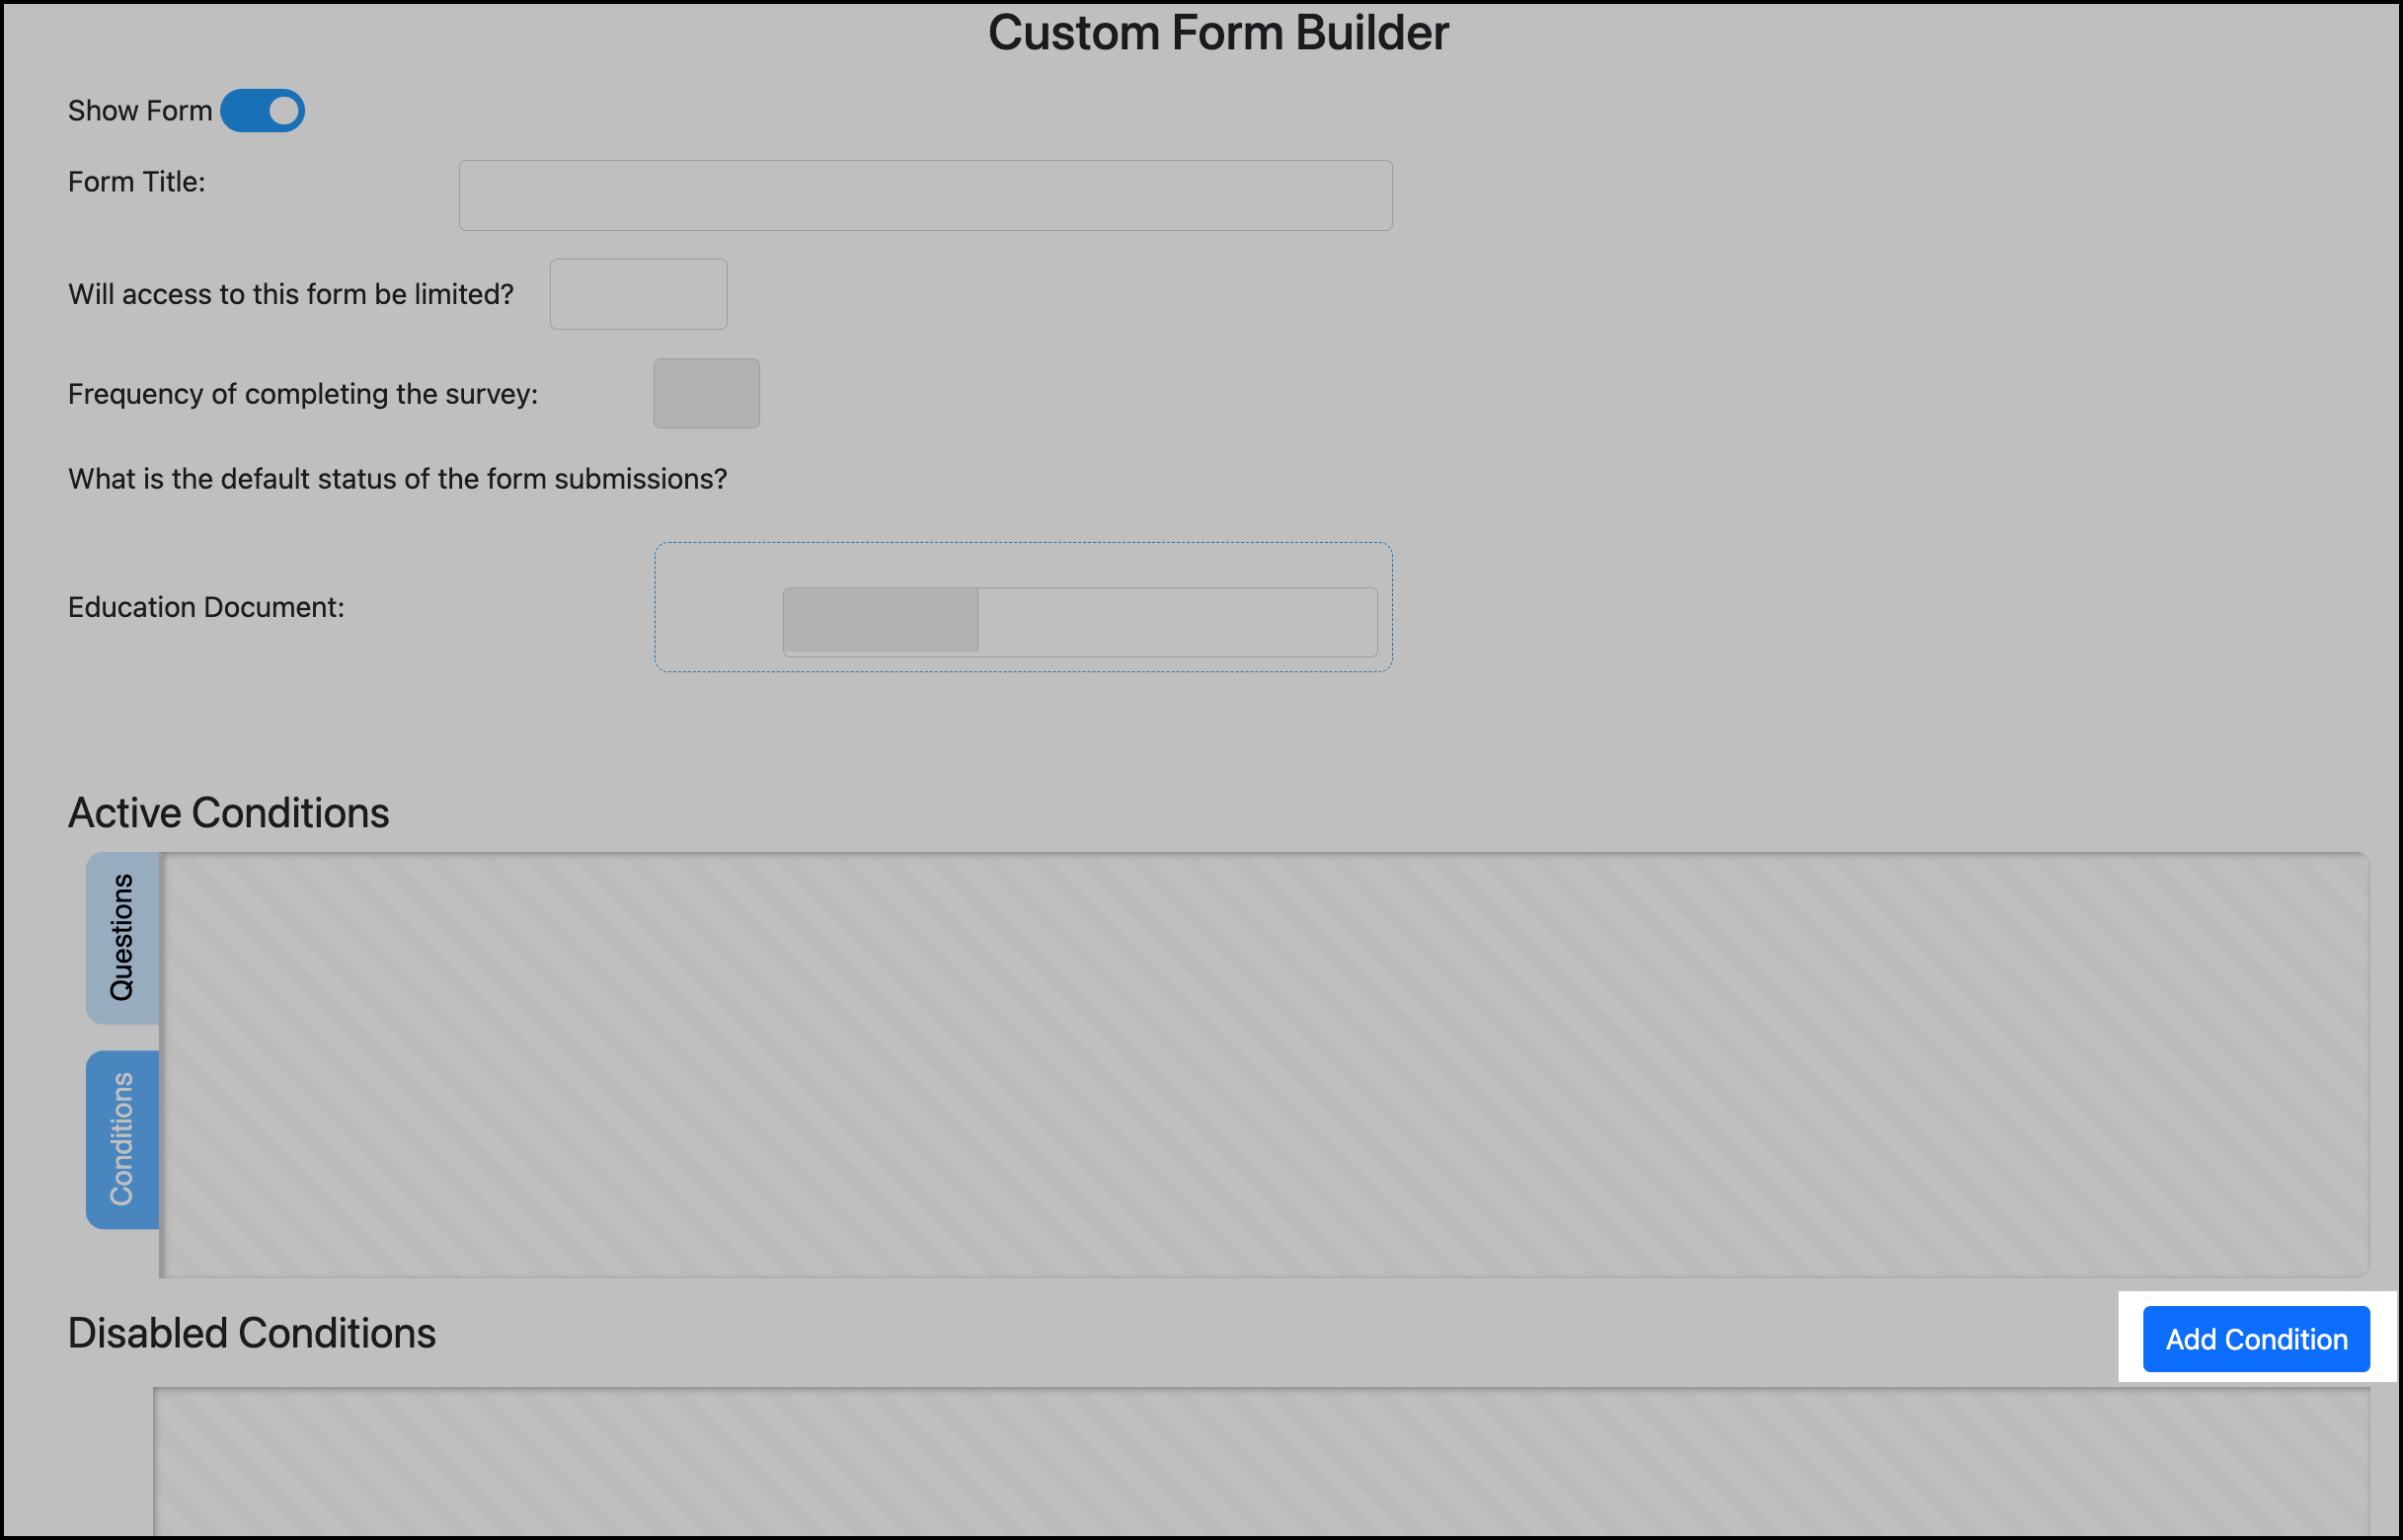
Click the Conditions tab in the Custom Form builder:
-
Click Add Condition:
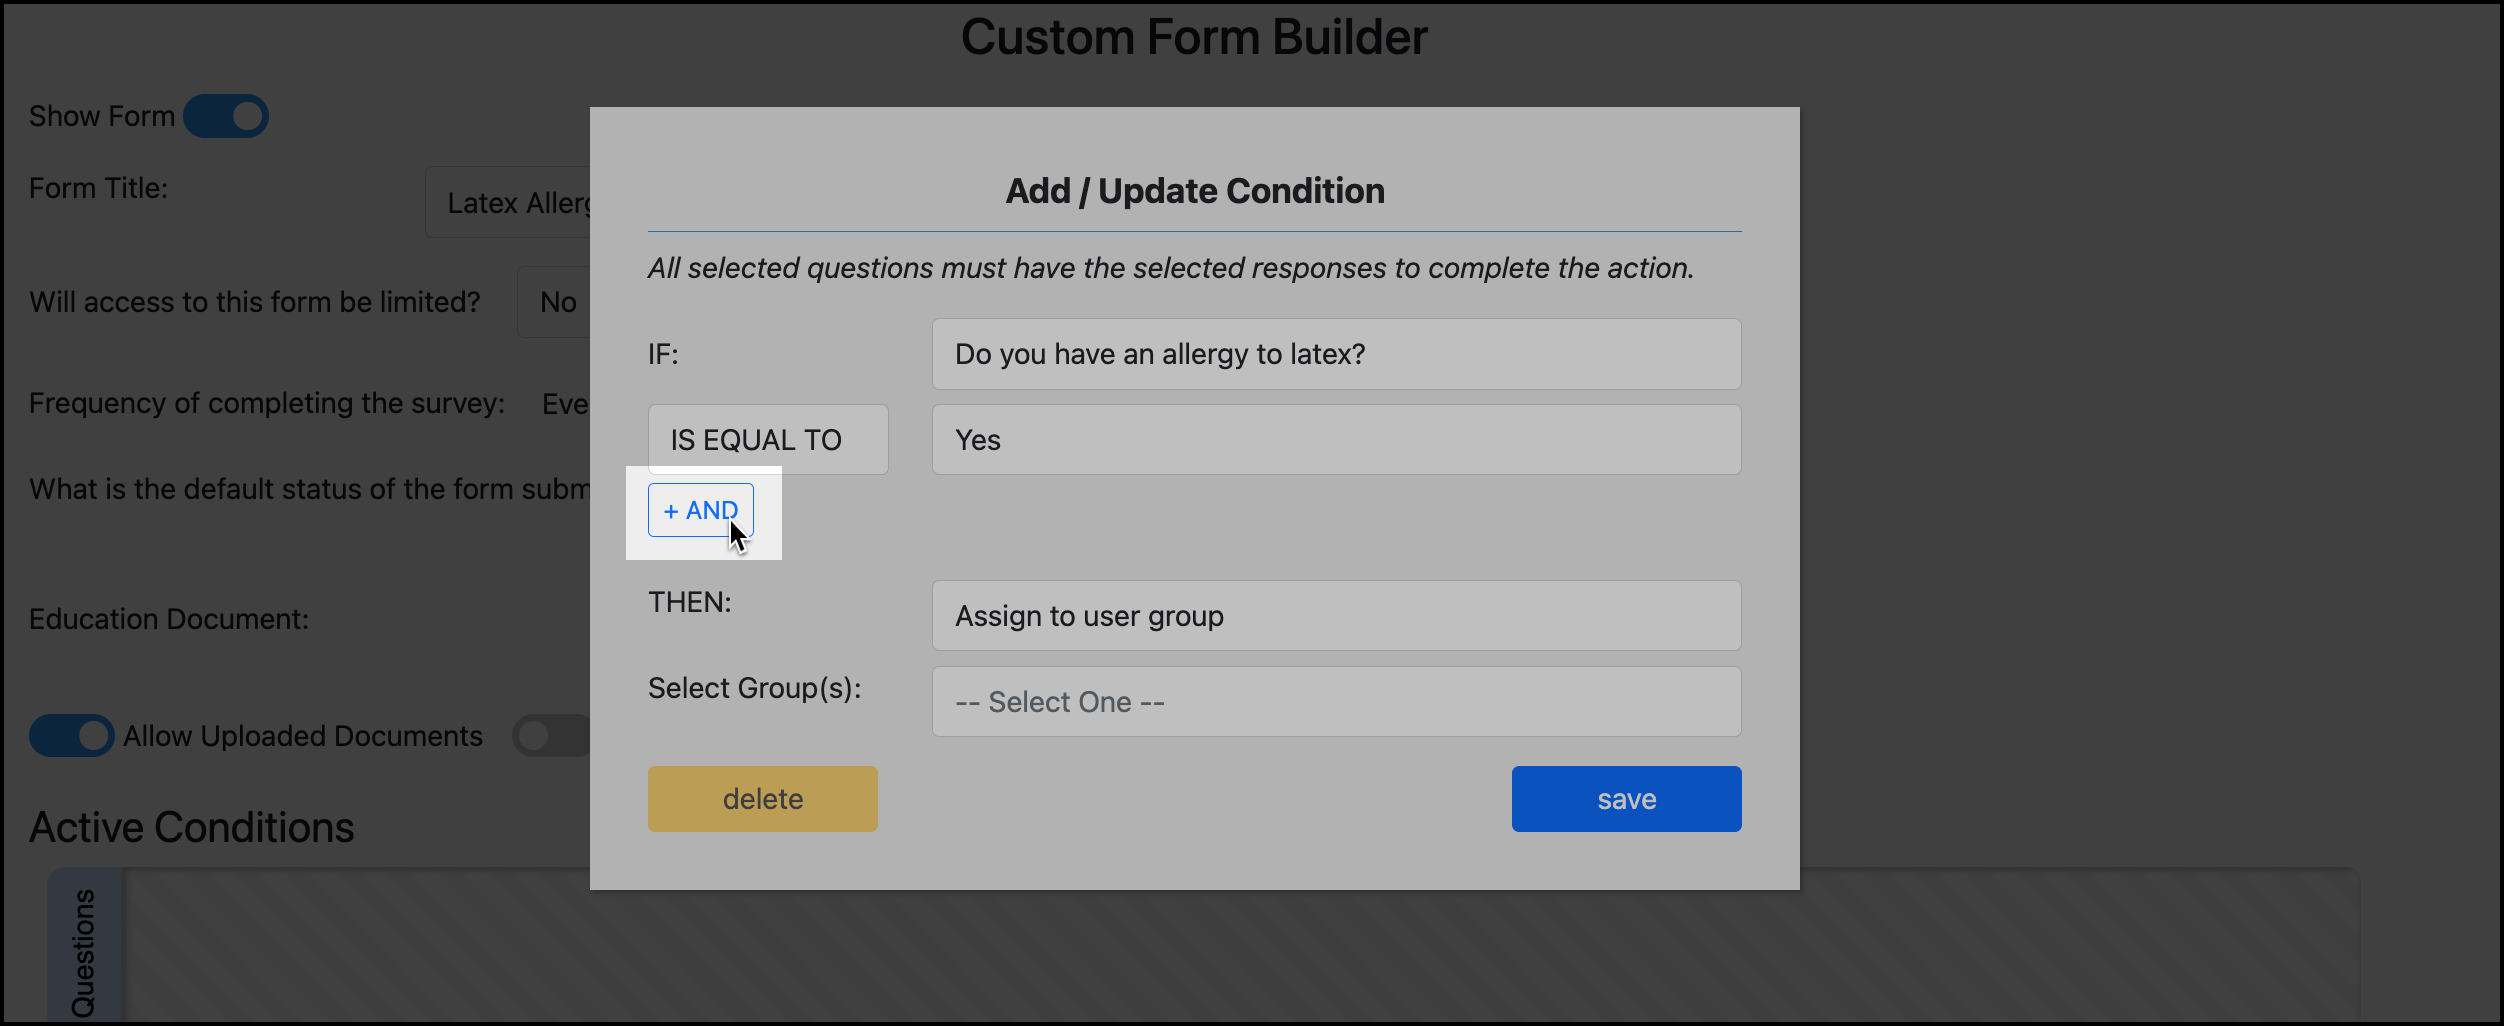
The following explains each part of the Condition Builder.
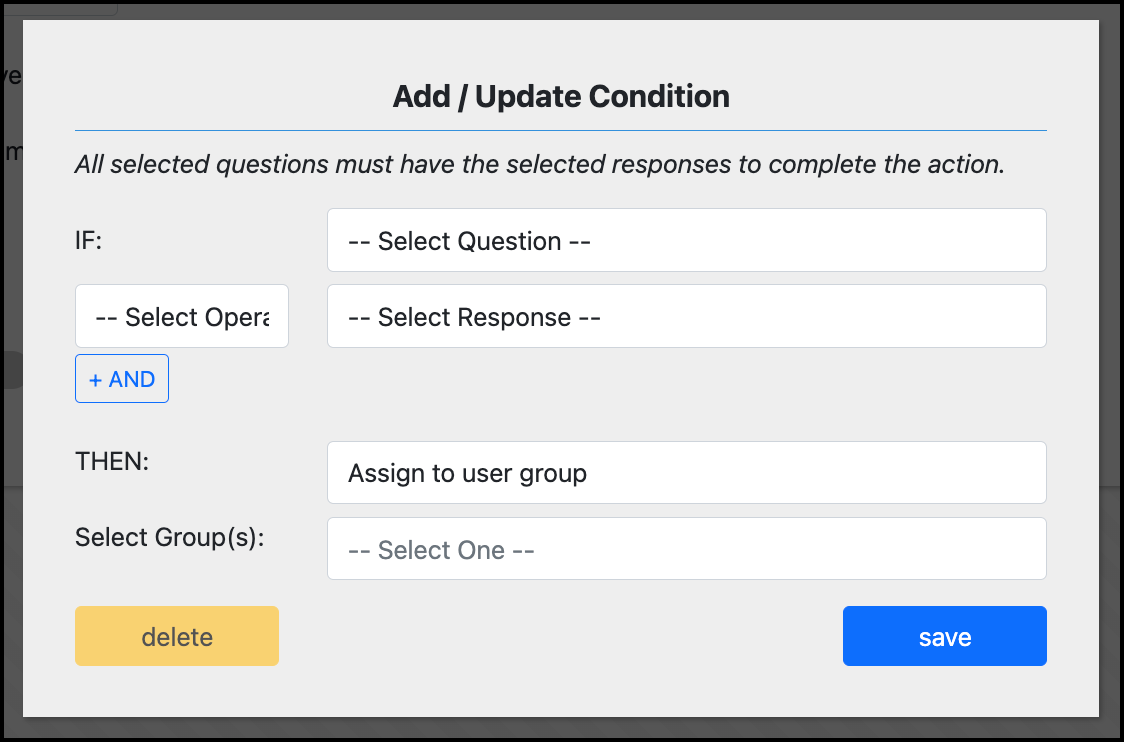
IF
Defines the question that the logic starts with.
This dropdown list will include all Yes / No questions in the Current Questions in the builder (both patient and clinical). You can select one question.
If you want one action to happen with a Yes response, and another action to happen with a No response, build two separate conditions for the same question.
IS EQUAL TO
First, the condition (operator). At this time, IS EQUAL TO is the only option.
Next, select the answer that will trigger the action. The options are only:
-
Yes
-
No
Example
IF: Do you have any allergy to latex?
IS EQUAL TO: Yes
THEN
Defines the action to take.
Available actions are:
-
Assign to user group
-
Remove from user group
-
Assign to patient tag
-
Remove from patient tag
Example
THEN: Assign to user group
Select Group(s) / Select Tag(s)
Defines the group(s) or tag(s) that the action will apply to.
This heading and list will change based on if you select a group or tag option.
Example
THEN: Assign to user group
Group: Latex Allergy group
For this example, the complete condition is:
IF: Do you have any allergy to latex?
IS EQUAL TO: Yes
THEN: Assign to user group
Group: Latex Allergy group
You can select multiple User Groups or Patient Tags to assign the participant to with the condition.
Use +AND to require additional answers
You can also use the AND option to require that multiple Yes/No questions have specific responses for the action to execute. This means that ALL the questions in the condition must be answered with the required answers to trigger the action.
In the following example, a participant will only be added to the N95 Fit Test group if they answer Yes for both questions.
Example
IF: Do you wear a mask at work?
IS EQUAL TO: Yes
AND
IF: Do you wear an N95?
IS EQUAL TO: Yes
THEN: Assign to user group
Group: N95 Fit Test
You can combine up to three questions in a single condition.
If you want respective question responses to lead to the same action, then build respective conditions for each question that are result in the same action.
The following example shows how the participant can answer Yes to either question to be added to the Annual Fit Testing group.
Example
Condition 1
IF: Do you wear an N95 mask at work?
IS EQUAL TO: Yes
THEN: Assign to user group
Group: Annual Fit Testing
Condition 2
IF: Do you wear a CAPR mask at work?
IS EQUAL TO: Yes
THEN: Assign to user group
Group: Annual Fit Testing
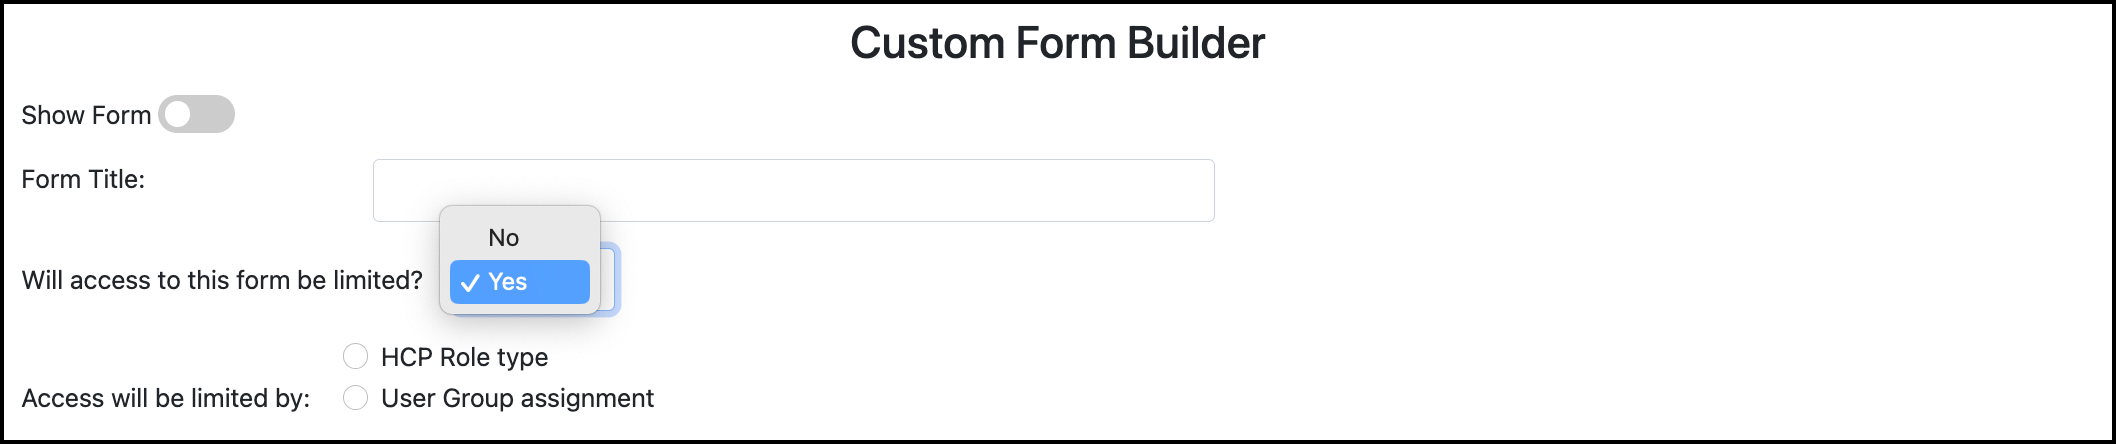
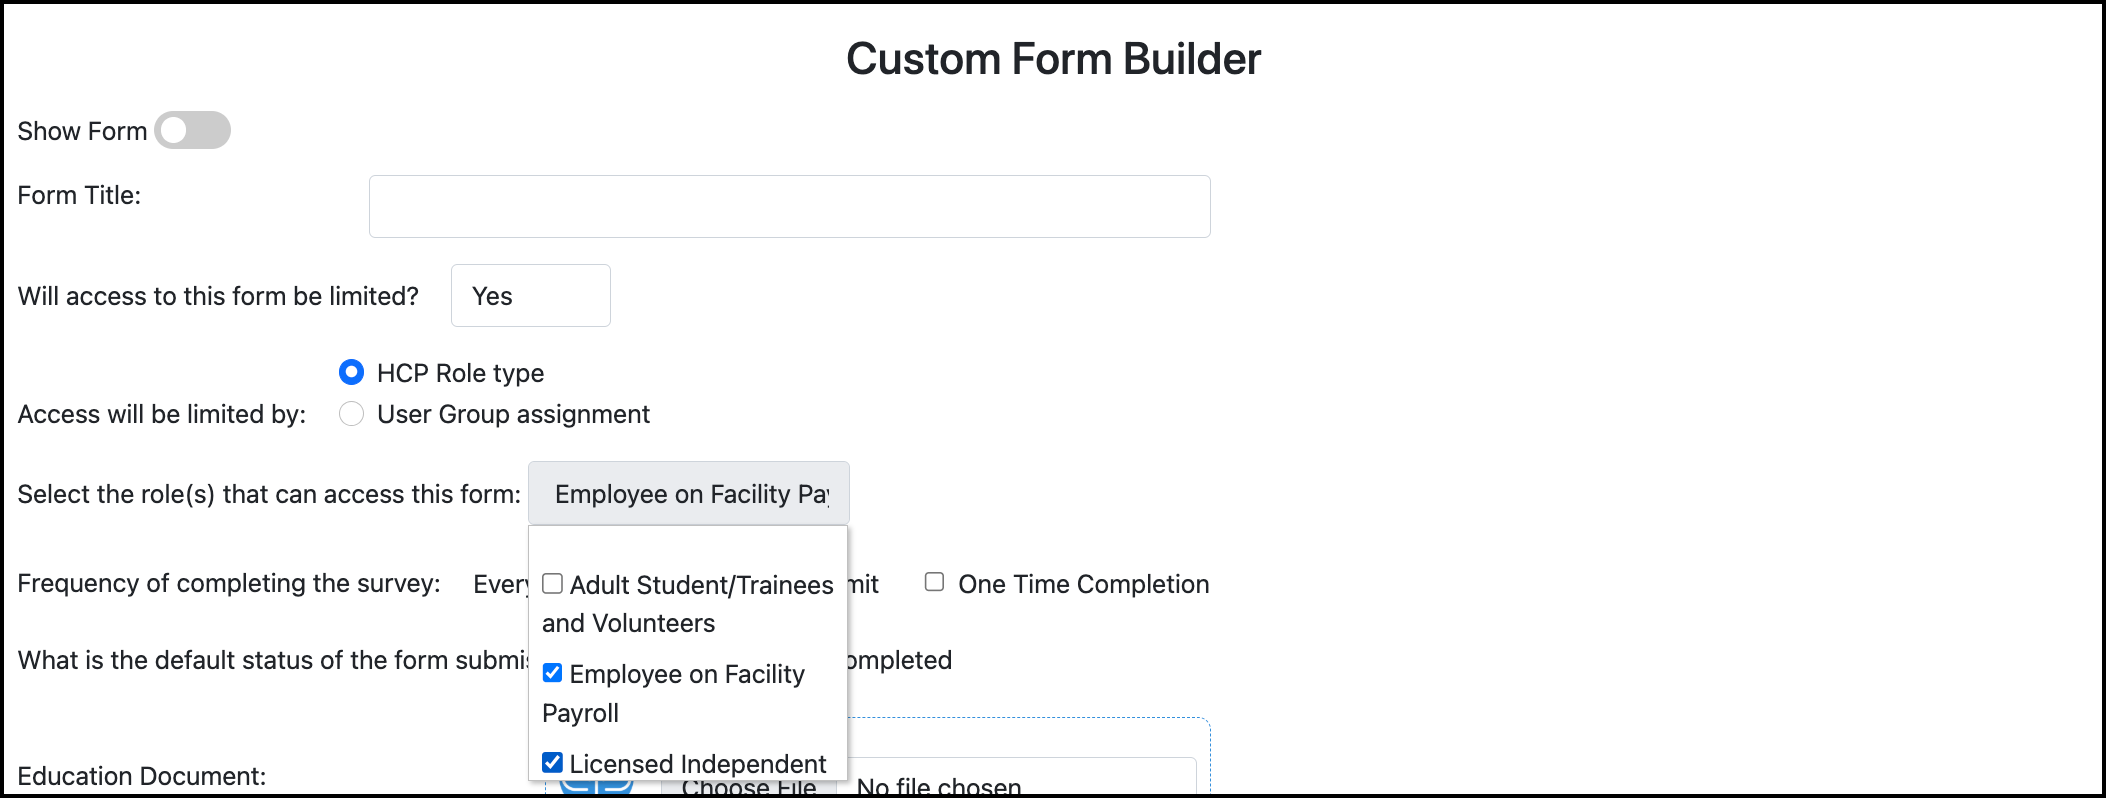
Restrict access to a form
You can limit which patient users can access and complete a custom form. A form can be restricted by HCP Role(s) or User Group(s).
-
In the form builder settings, select Yes to limit access to the form.
-
Select how to restrict the form.
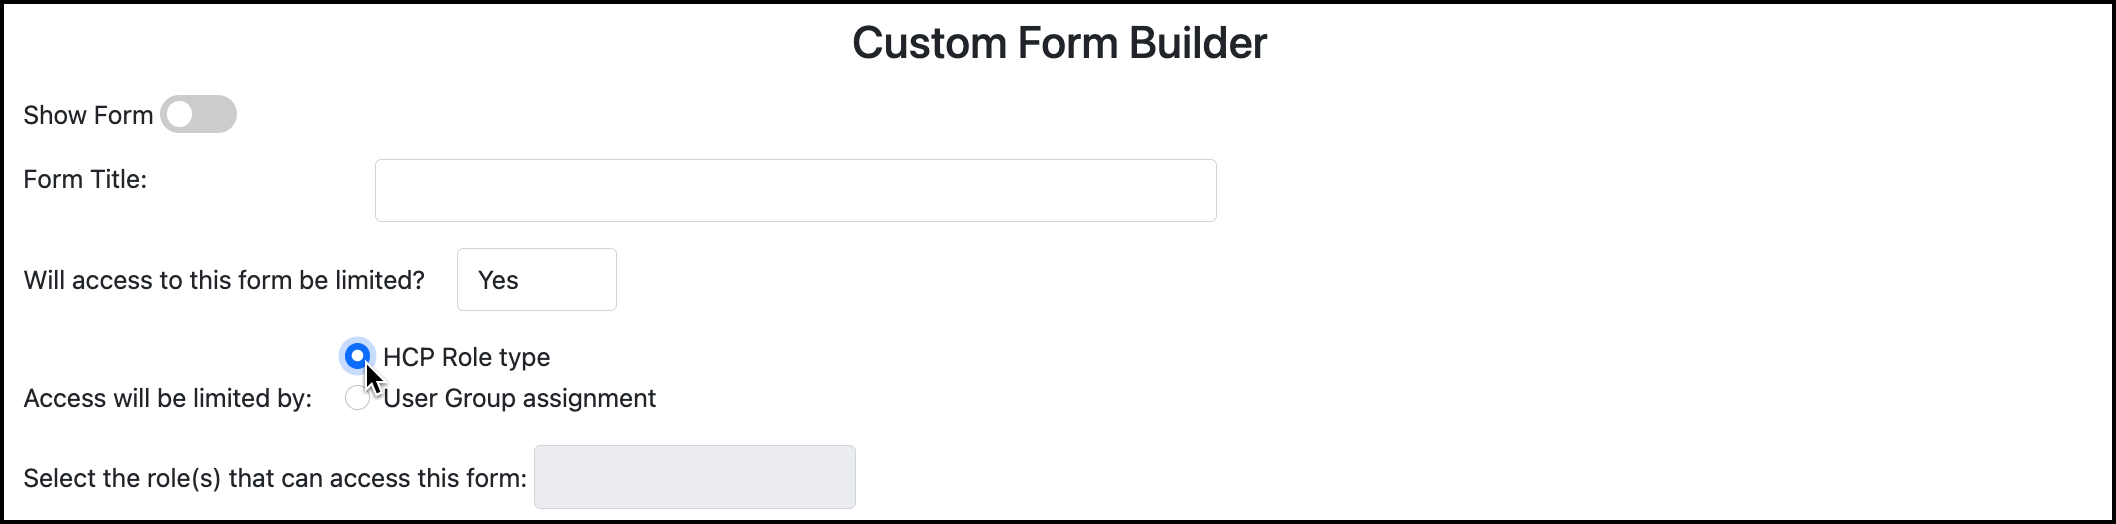
-
You can select multiple HCP Roles or User Groups to restrict the form to. Only participants assigned to the selected HCP Role(s) or User Group(s) will be able to access the form.
Click Save Form to save all changes.
This can be changed at anytime by returning to the form builder and changing the form limitation setting.
Participants who cannot access the form will not see the form available to start in their Forms and Consents page.
If a participant has completed the now hidden form in the past, they will still see the form record in their Completed Forms and Consents.