.png)
This guide explains how clinical users document and view lab test results for patients. All steps are completed in the Clinical role in TrackMy Verivax, from the Tests action button in Search for Patient.
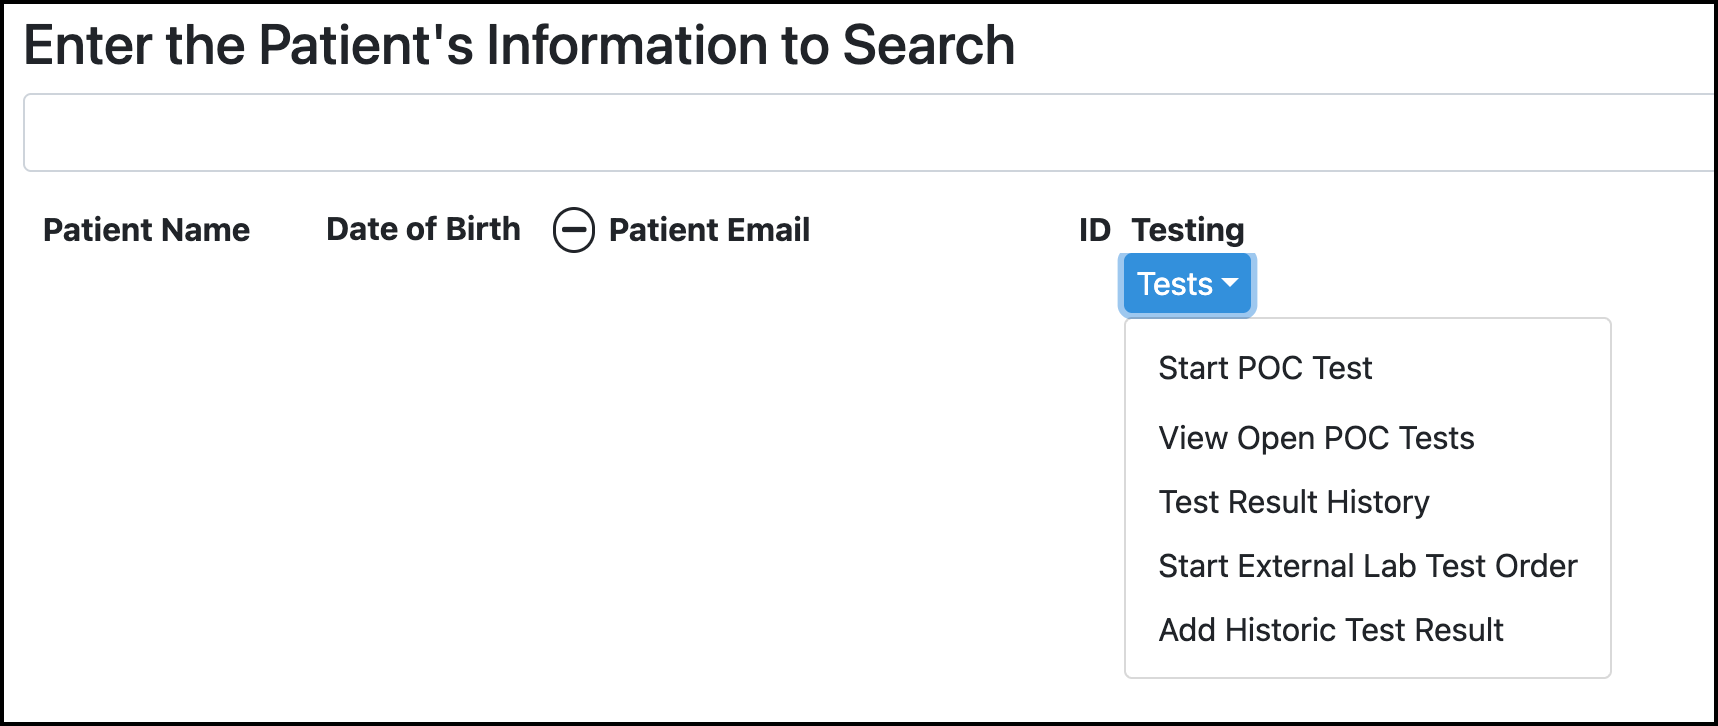
The Tests button options have been renamed and expanded. "Submit Test" is now Start POC Test, and "View Tests" is now View Open POC Tests. Two new options have also been added: Add Historic Test Result and Start External Lab Test Order. See below for how to use each one.
All workflows described here are accessible to Clinical users via the Search for Patient tile:

Start POC Test
Use this when you are administering or observing the test yourself, right now.
-
Search for the user in Search for Patient.
-
Click Tests → Start POC Test.
-
Confirm the patient.
-
Select one or more test types. You can now start multiple tests at once from this screen.
-
Confirm the test details for each. The test date can be changed to any past date, but not a future date.
Once started, each test appears within View Open POC Tests, ready for you to enter the result.
Administrative Group permission required to show this option
Search for patient - Submit tests
Report a test result
-
Search for the user in Search for Patient.
-
Click Tests → View Open POC Tests.
-
Click Report Result for the test.
-
Select the result and click Save.
The Reporting Lab field has been removed from this screen for all test types — every POC test documented this way is now treated as internal to your organization.
Administrative Group permission required to show this option
Search for patient - View tests
Add Historic Test Result
Use this when a result already happened somewhere else, and you're just getting it into TMV — you are not administering anything right now.
-
Search for the user in Search for Patient.
-
Click Tests → Add Historic Test Result.
-
Confirm the patient.
-
Select one or more test types, and enter the result and date for each.
Add Historic Test Result and Start POC Test should not be used interchangeably. A result entered through Add Historic Test Result does not generate a printable TMV Result Document. If you need a printed result document — for example, for a test being performed on the spot that you need to have documentation for later — use Start POC Test instead, even if you enter the result immediately after.
Administrative Group permission required to show this option
Search for patient - Add historic test
View a patient's test history
To view a patient's full test history:
-
Search for the user in Search for Patient.
-
Click Tests → Test Result History.
See View a patient's test history for more information about that page.
Administrative Group permission required to show this option
Search for patient - View test history
External Lab Test Order Forms
Use this to generate a Lab Test Order Form for a patient to take to a connected external lab partner. See Set up and generate a Lab Test Order Form (LTOF) for how lab partners and order form templates are set up.
-
Search for the user in Search for Patient.
-
Click Tests → Start External Lab Test Order.
-
Confirm the patient.
-
If your organization has more than one lab partner or order form template, select which one to use.
-
Select the test type(s) for the order, then review the auto-filled form.
-
Click Print. The completed form is automatically saved to the patient's Documents.
Administrative Group permission required to show this option
Search for patient - Start external lab order