.png)
This guide explains how to create an appointment for a patient. Your locations, appointment types, services, and available times will depend on your unique configuration. Your TrackMy Client Success team will build these settings during implementation.
-
In your clinical TrackMy portal, go to Manage Appointments (tile).
-
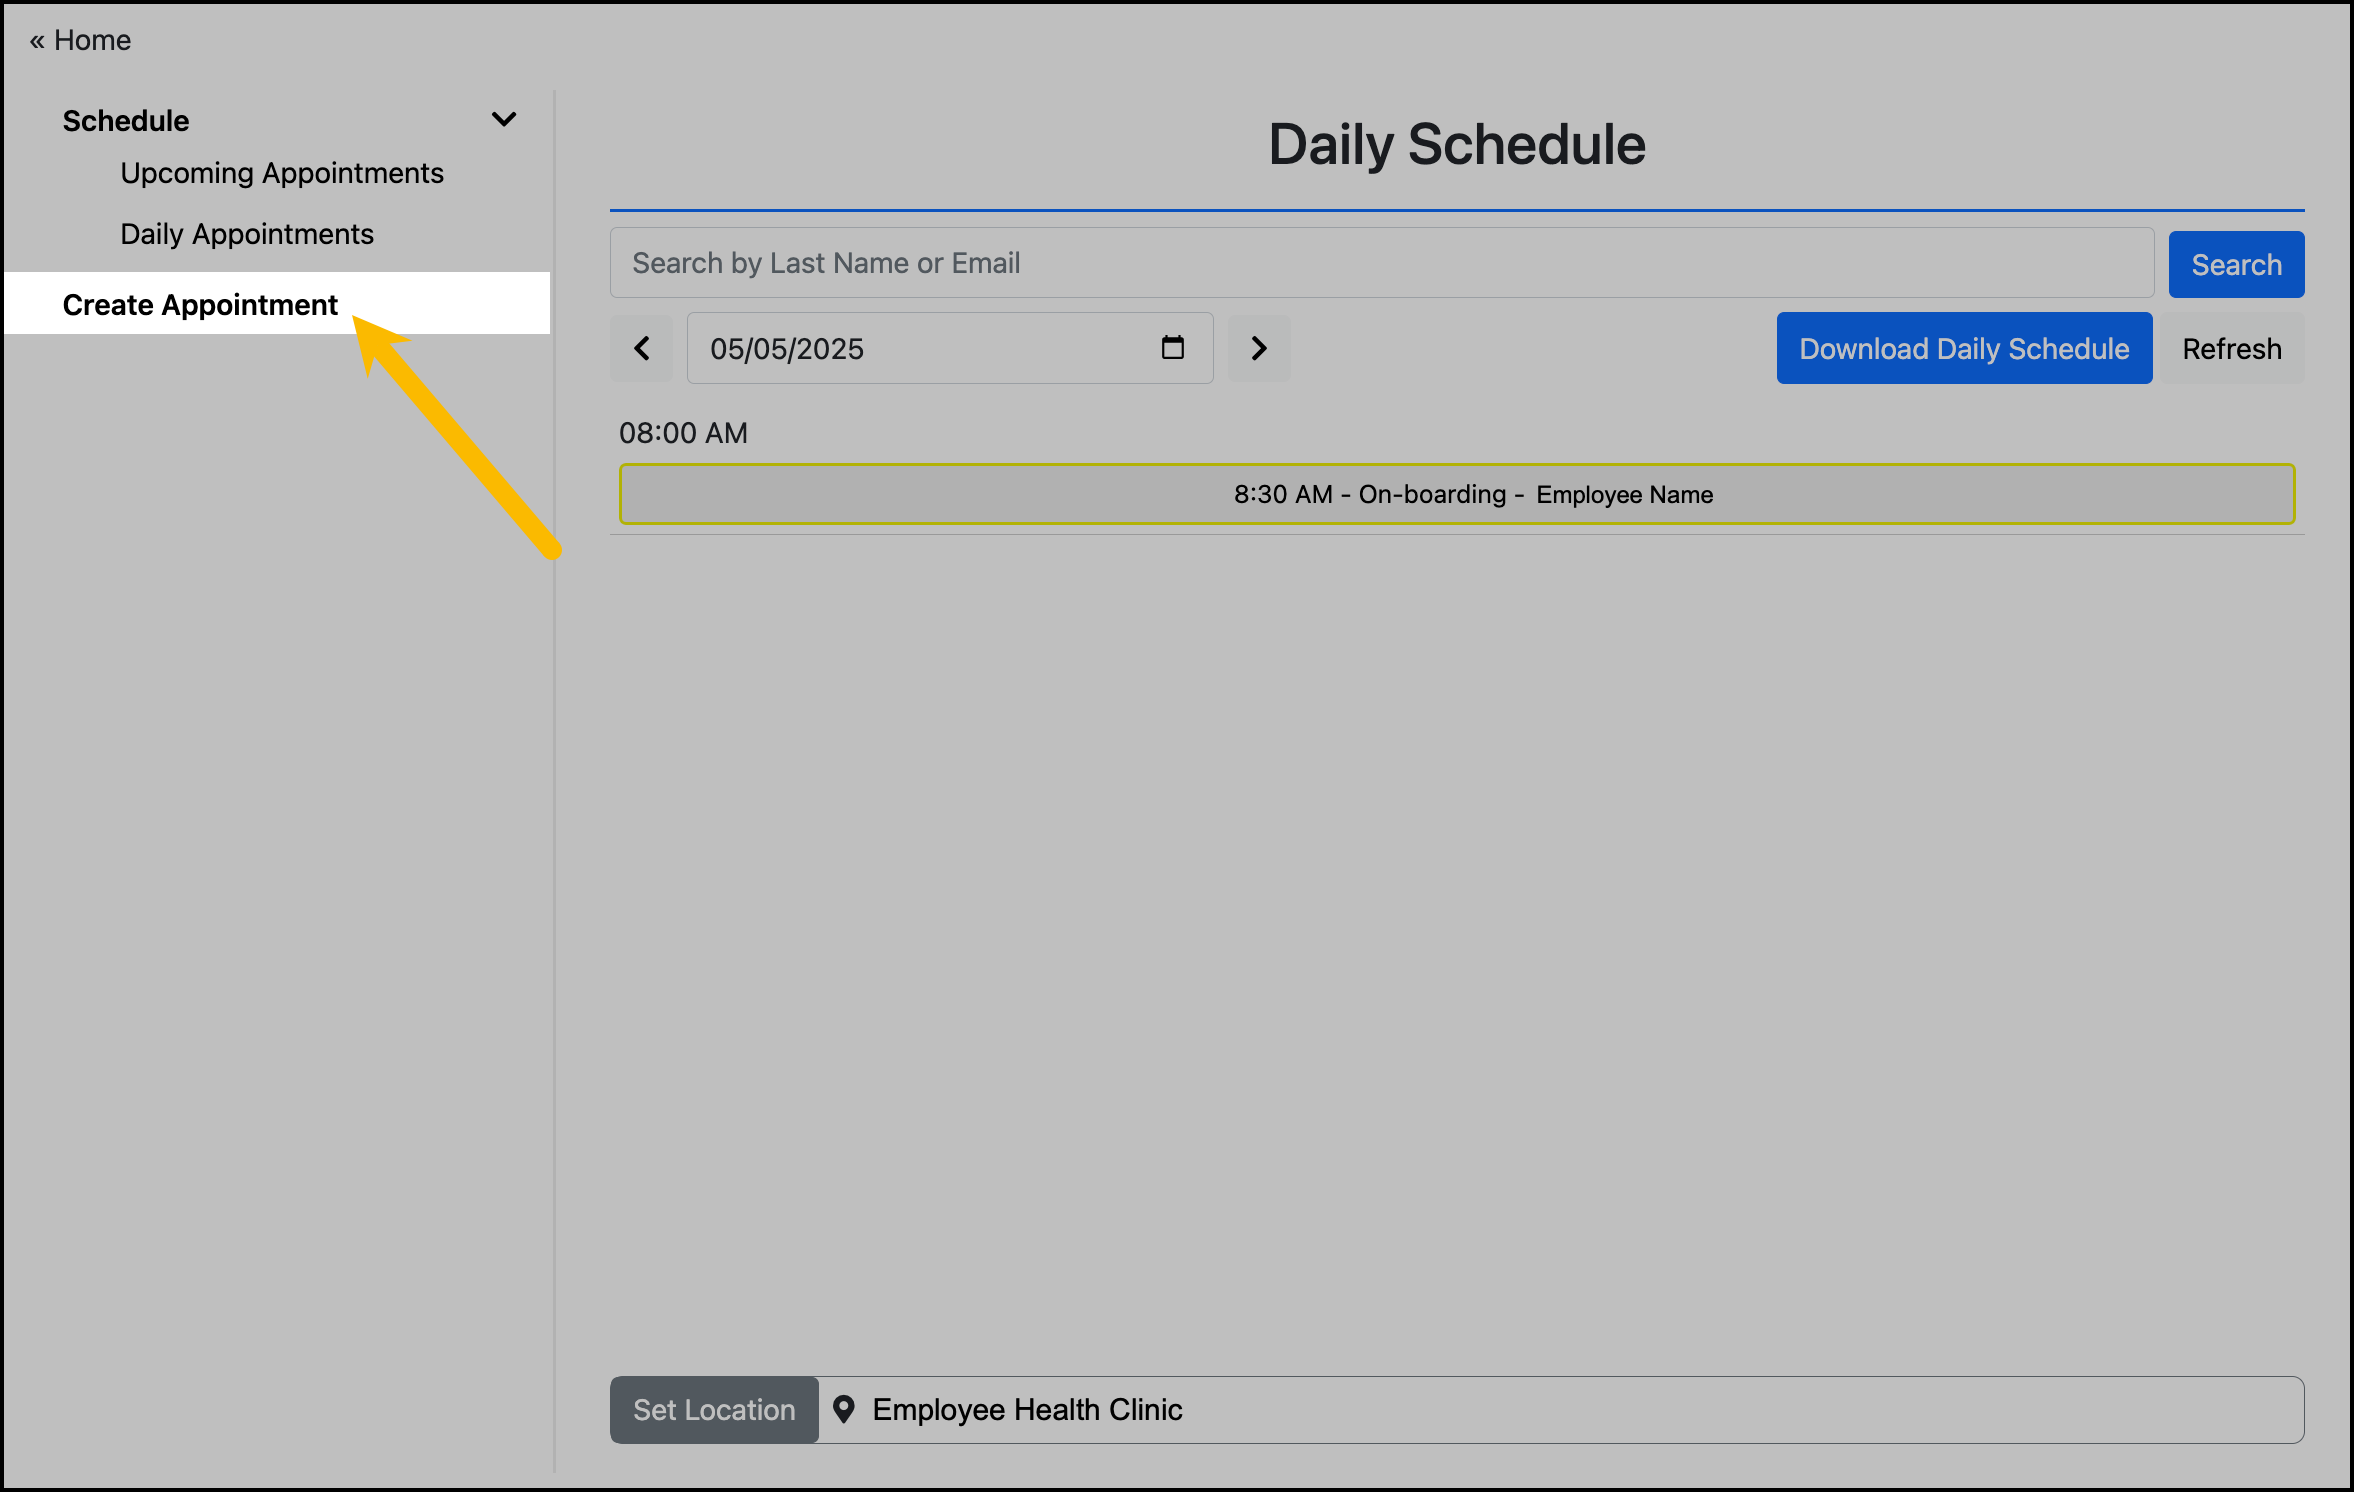
Click Create Appointment:
-
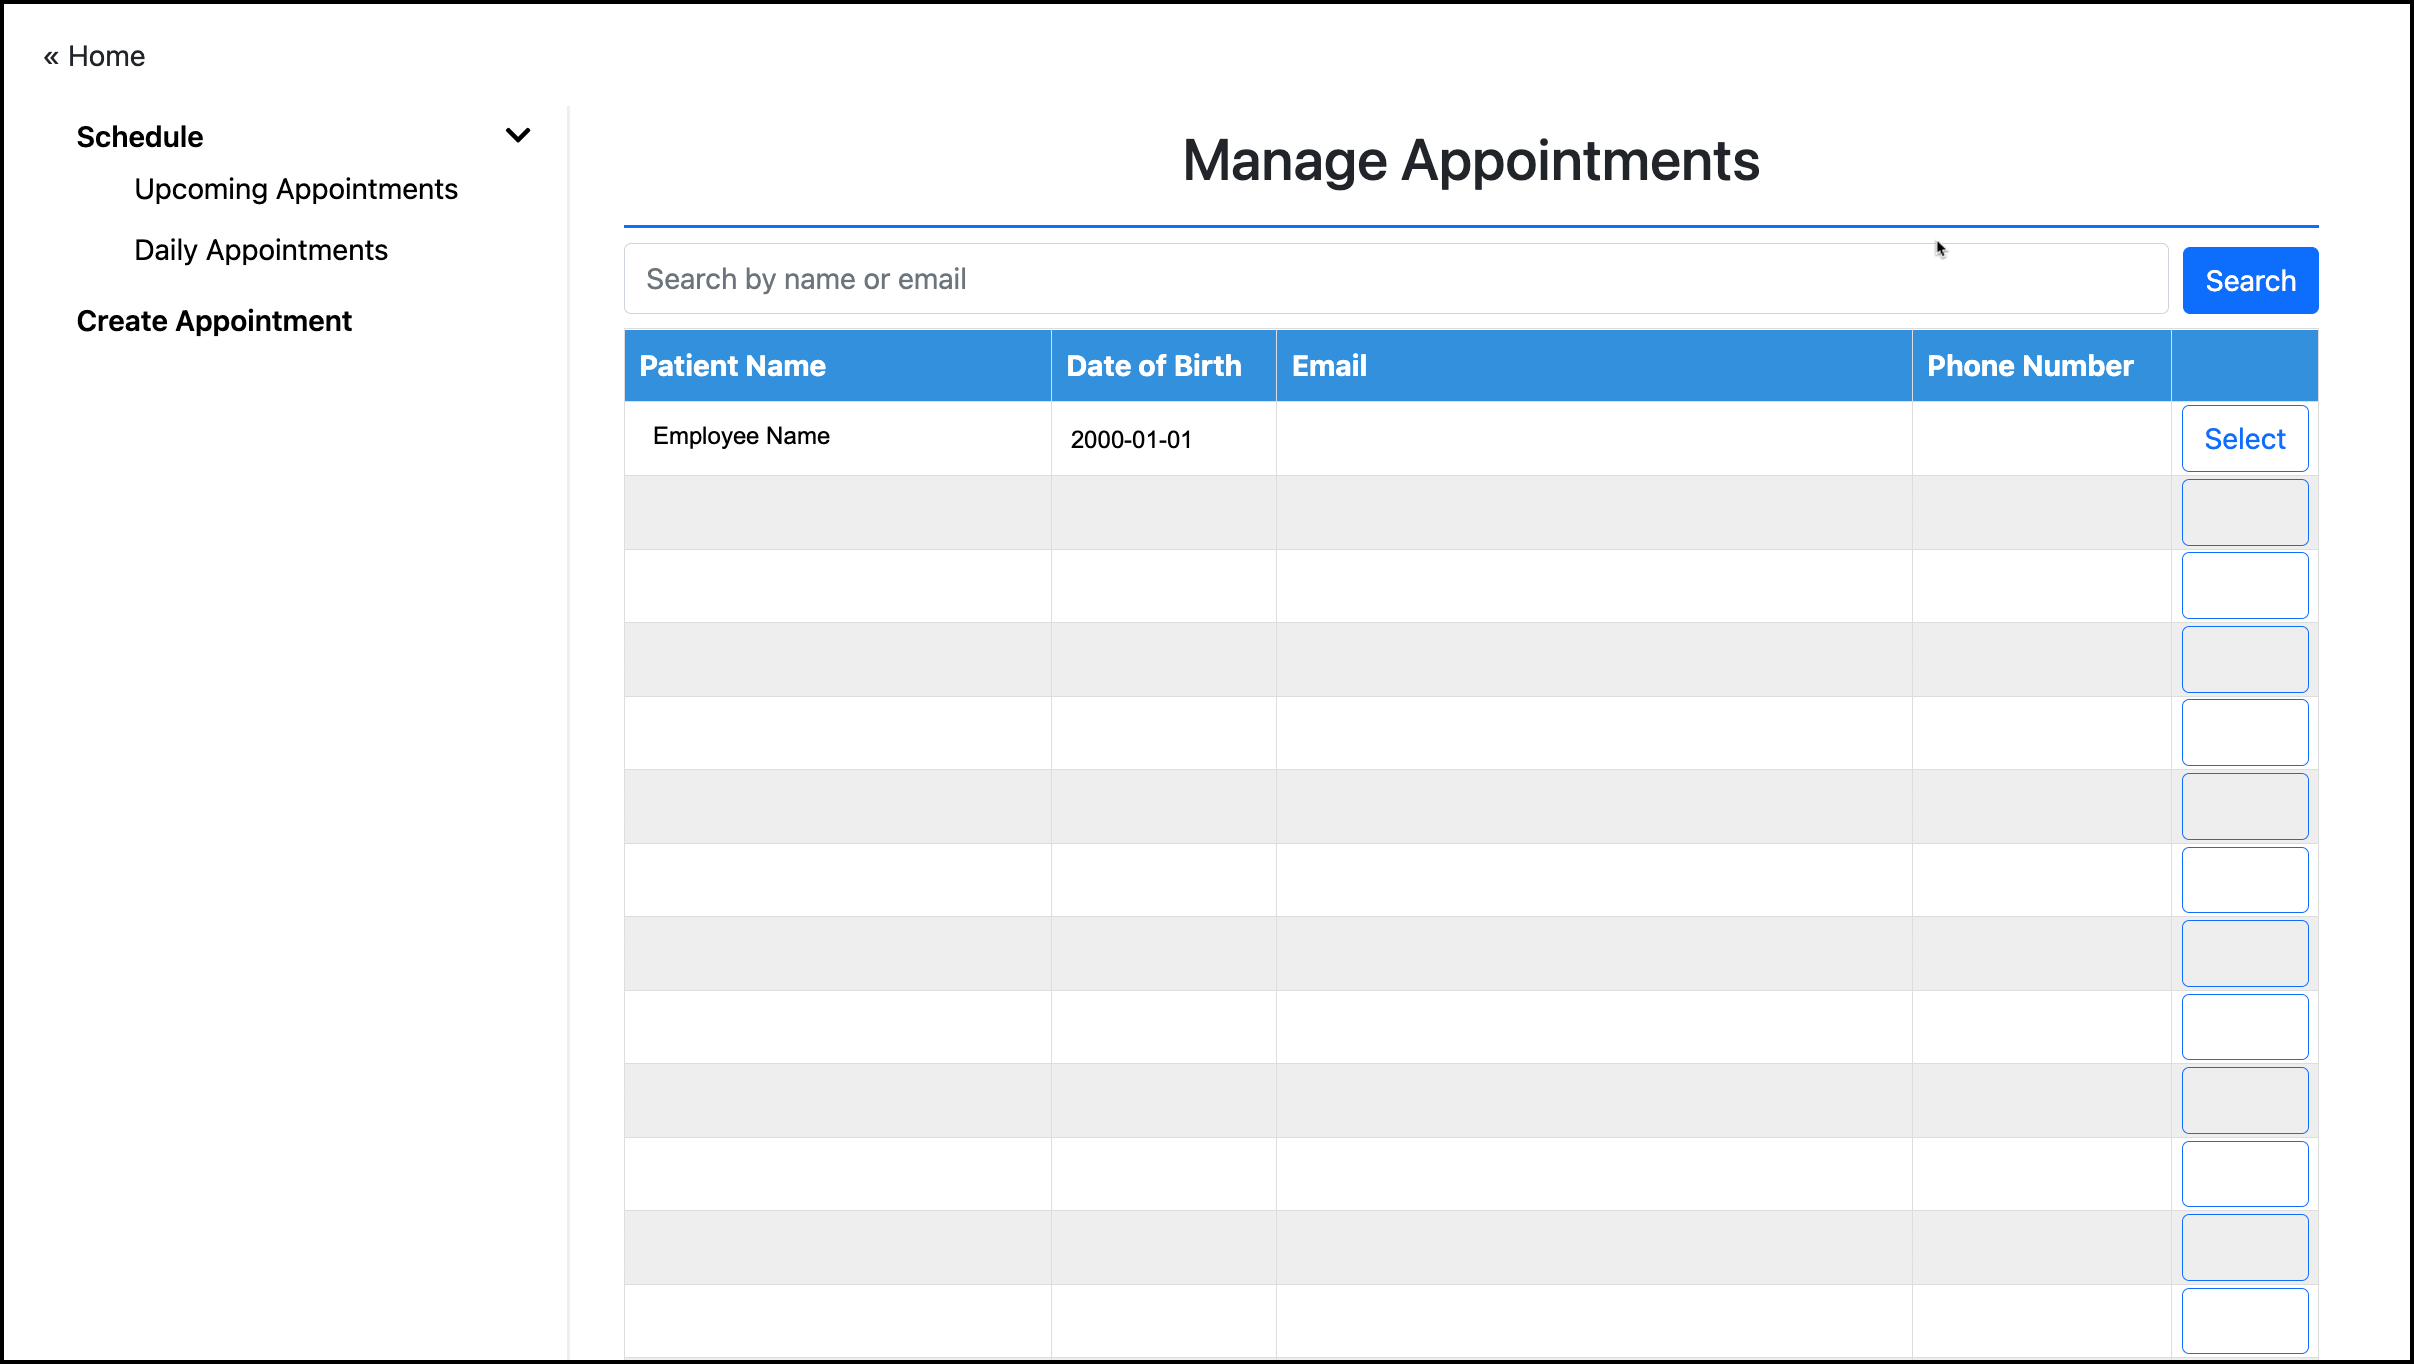
Search for patient and click Select:
-
After selecting the patient, you will choose whether to check in the patient now or create a future appointment.
Check in patient now (create walk-in appointment)
This option will send you straight to the check-in workflow.
Schedule future appointment
This option will allow you to schedule a future appointment time for the patient. This workflow requires selecting a location, service, and time for the appointment.
-
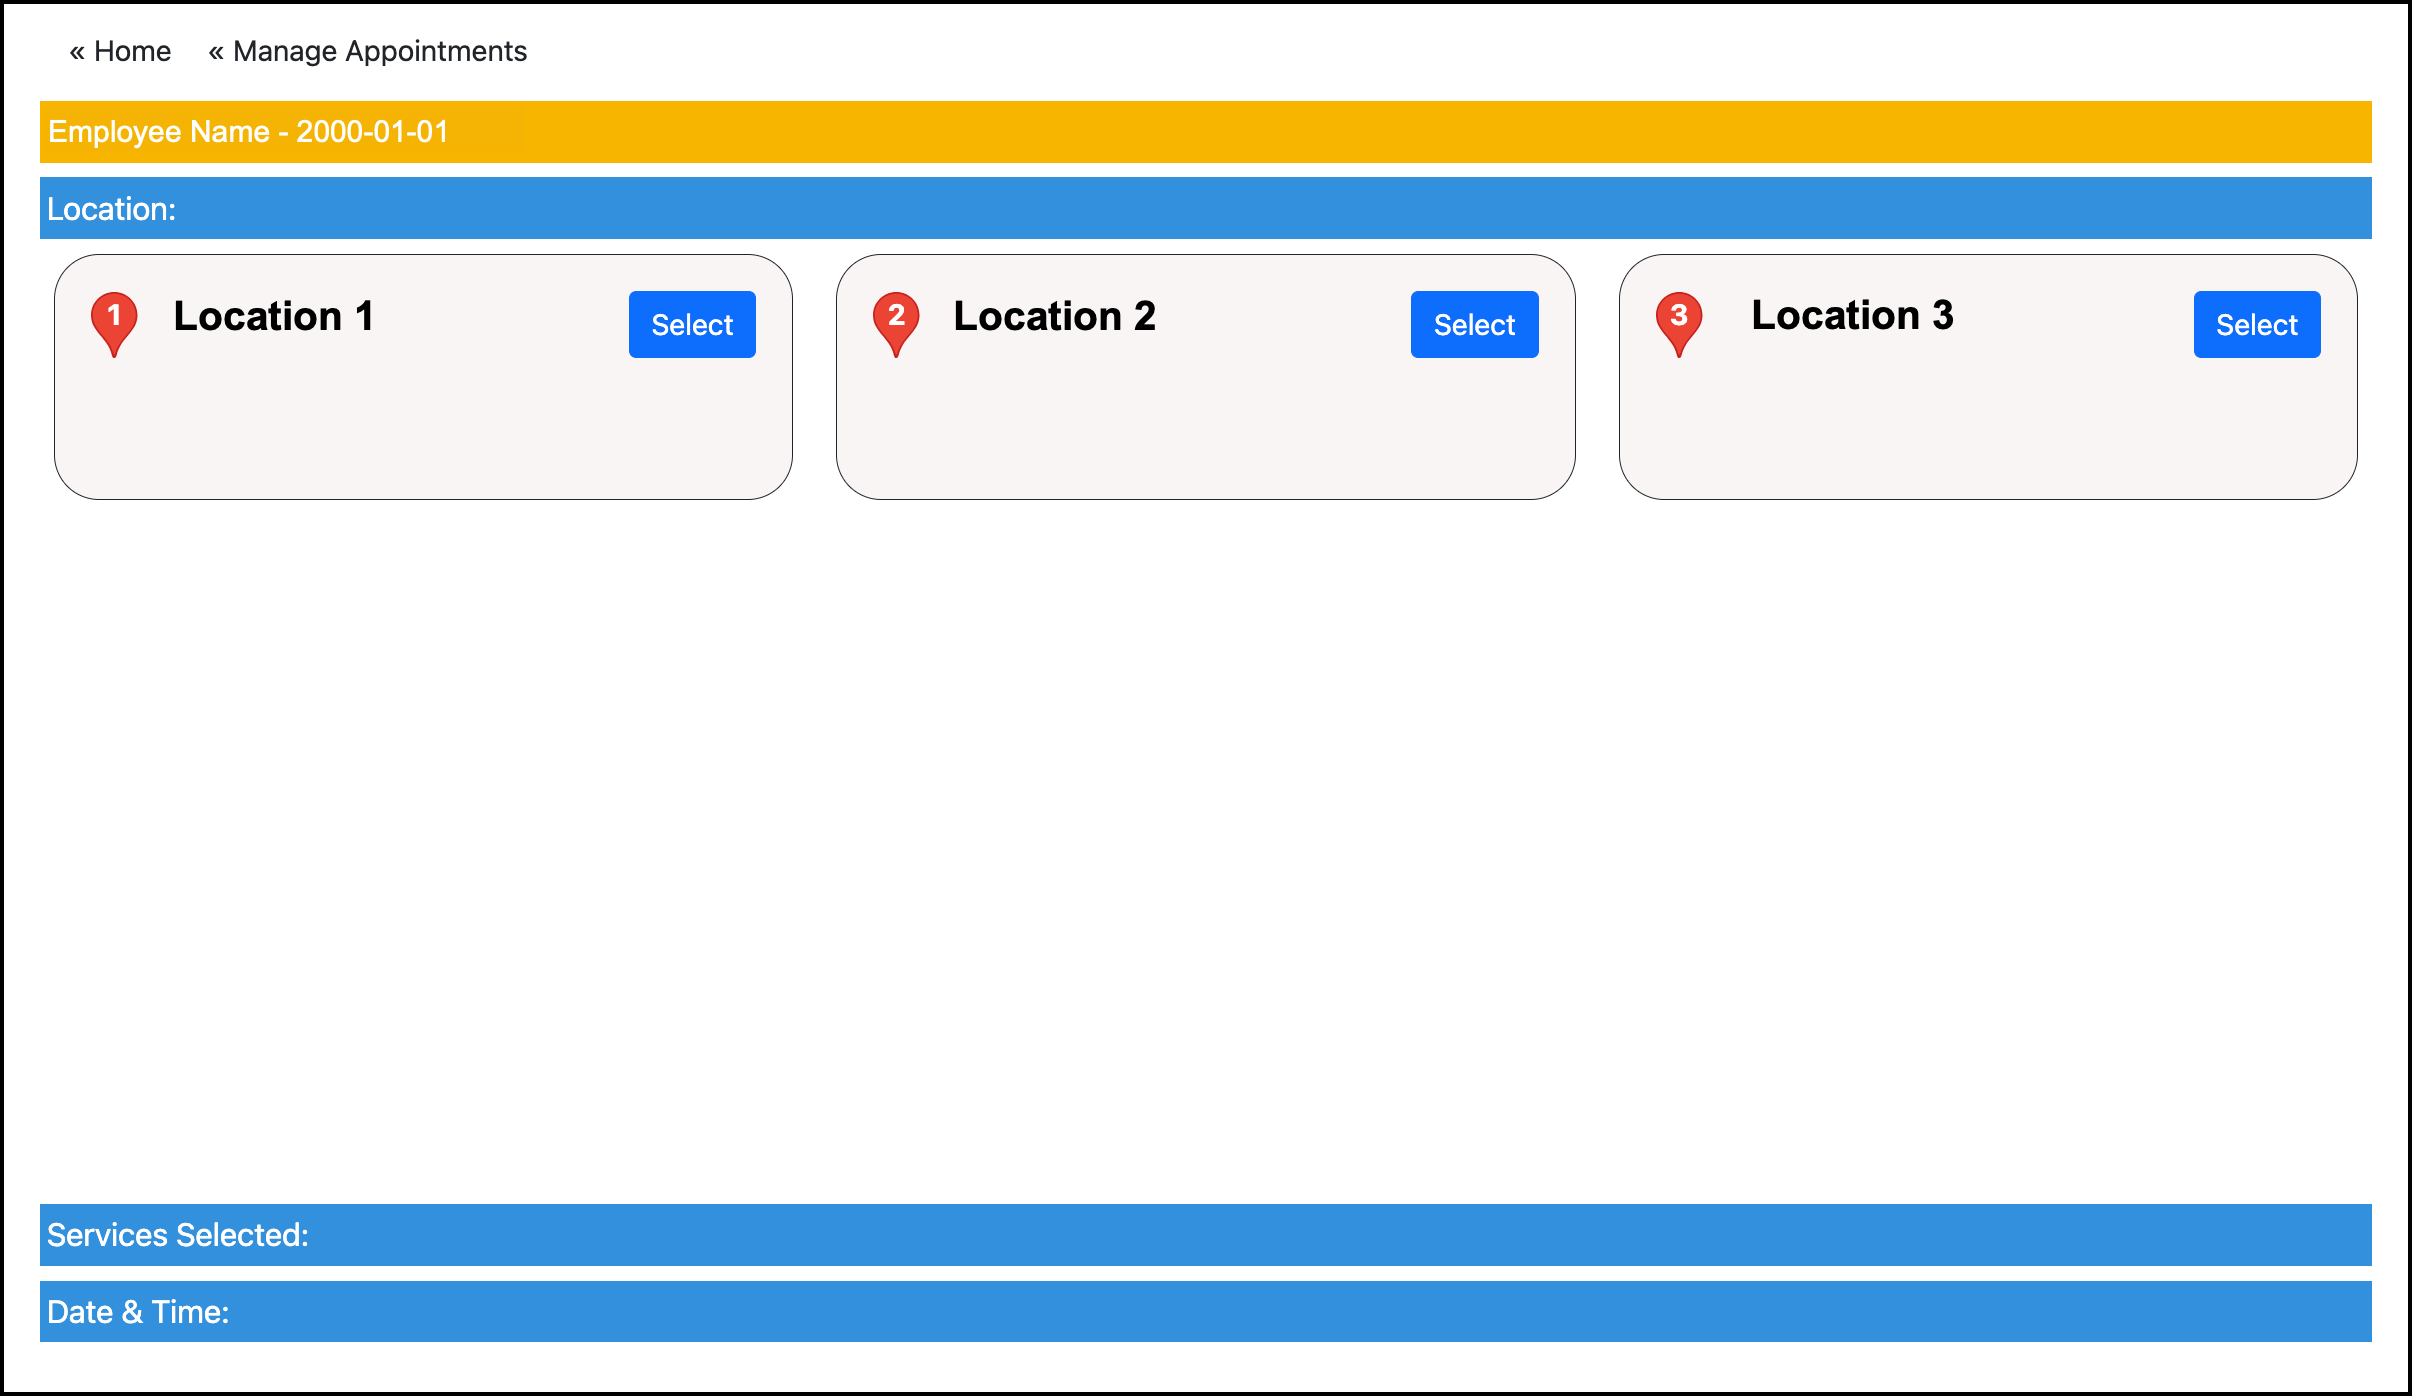
Select location for the appointment:
-
Select service(s):
The services you see will vary based on what service(s) the location offers.
Some services will require additional selections.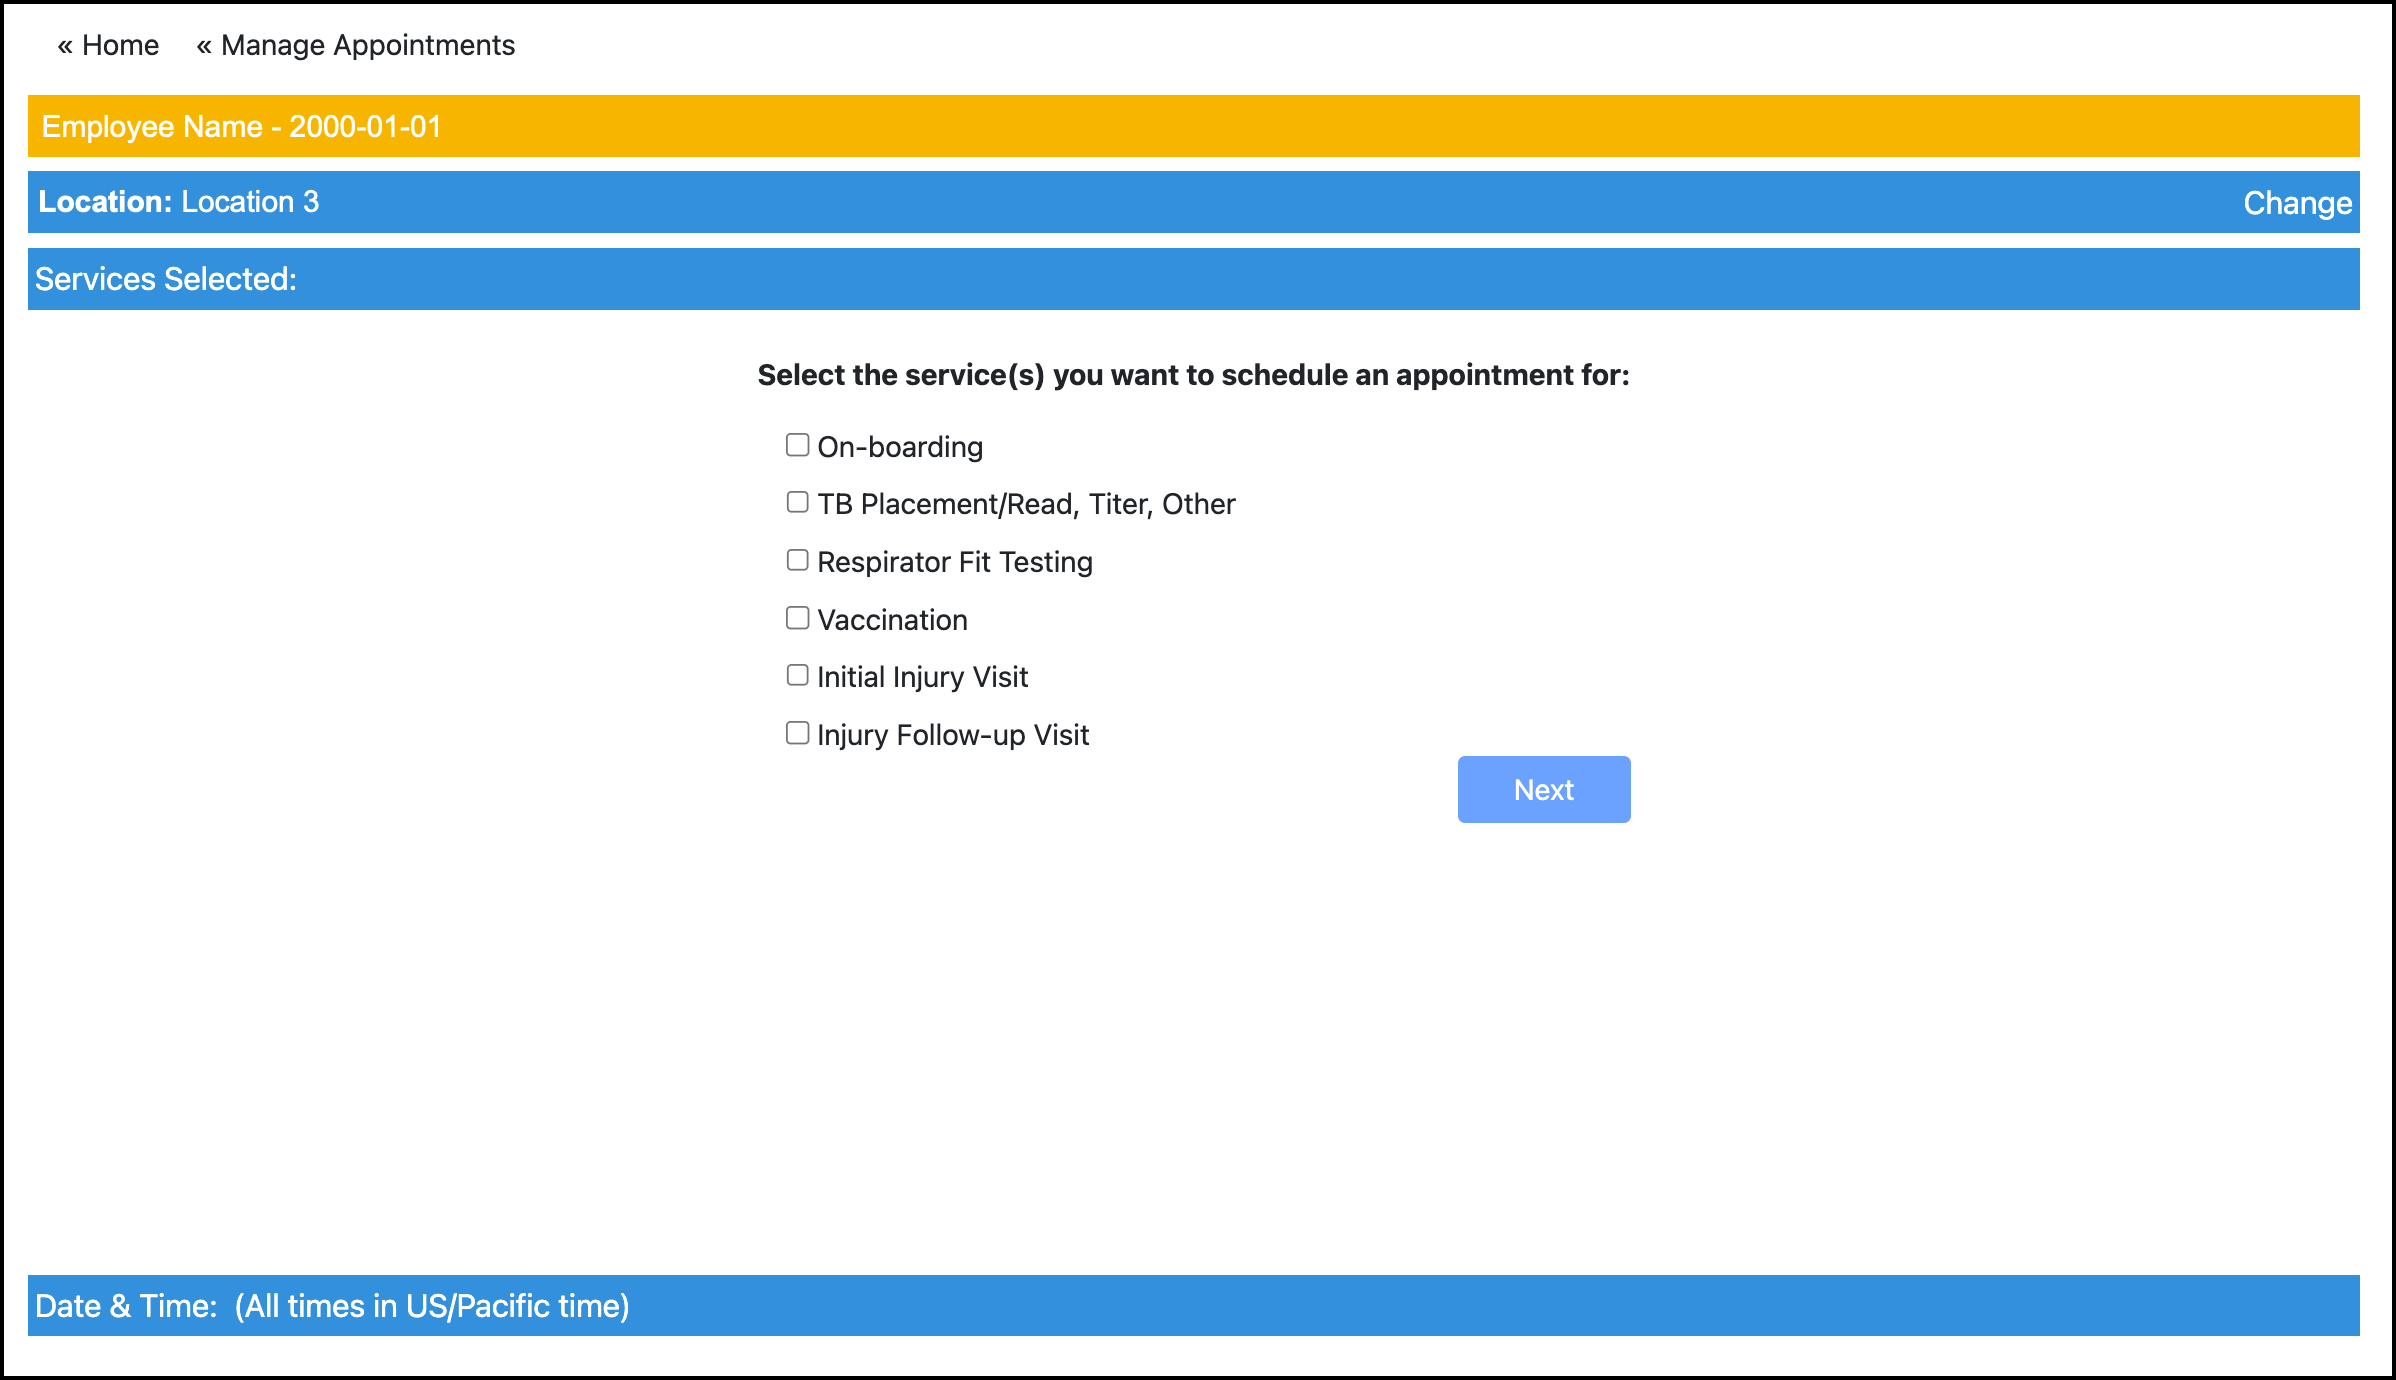
-
Select time:
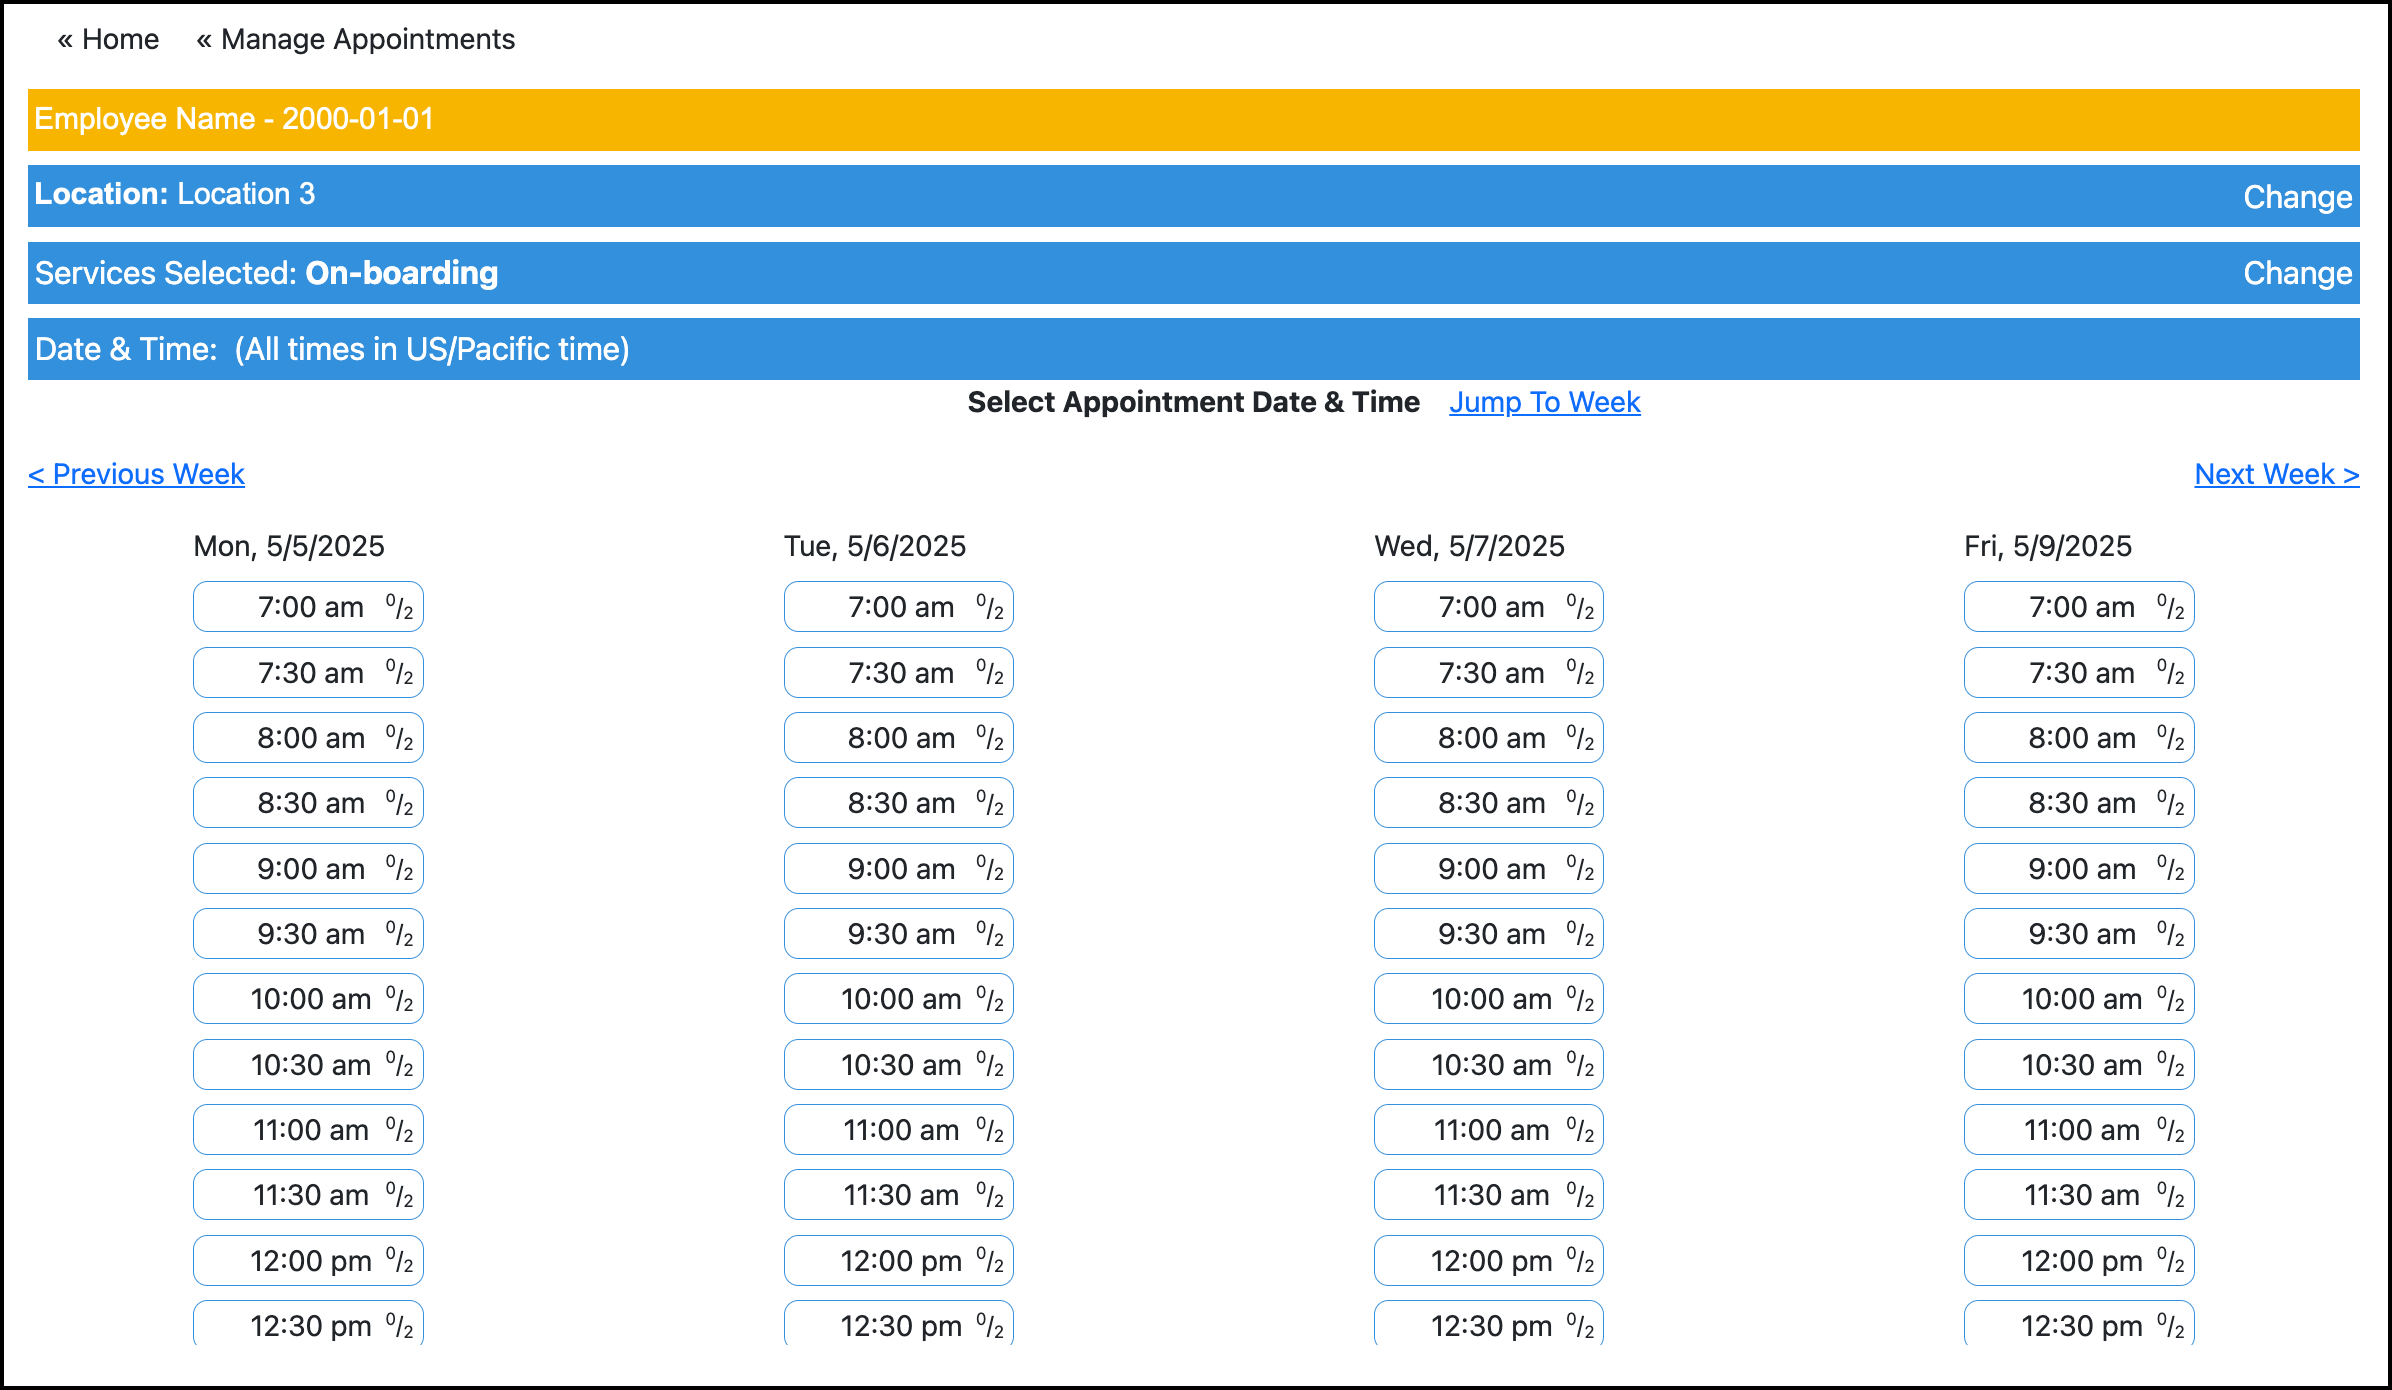
-
Review appointment summary. At this time, you can print the appointment details.
